Powershell

Prevent Copilot PWA from being installed

One issue that I have noticed since I have been testing the latest Windows 11 upgrade, is the automatic installation of the Copilot Progressive Web App (PWA).

The problem with this Copilot Progressive Web App is that it is intended for non-work accounts which makes it pointless on an Enterprise OS. To address this issue, I wrote the following PowerShell script to automate the process of preventing the Copilot PWA from being installed after a Windows 11 upgrade. By running this script before the user gets to their desktop, administrators can ensure that the Copilot PWA is not installed on any user profiles, providing a cleaner and more controlled environment.

NOTE – The script needs to run before the application is installed on any system since it is setting a few registry keys that Microsoft is using as a flag to detect if the application was installed.

This same script has also worked well on Windows 10 since we started noticing a Copilot app appear on some of our Windows 10 desktops. It can run after a Windows 11 upgrade is complete using a Success.cmd file to execute the script as soon as the upgrade is successful (I won’t go into detail on how to set this up since Microsoft has done a great job with documenting this process Run custom actions during a feature update | Microsoft Learn). Last but not least, you can add the script to your Autopilot process or OSD task sequence as well so new systems will not receive the application.

Powershell Script:

Function Write-Log {

    [CmdletBinding()]
    Param (
    [Parameter(Mandatory = $True, ValueFromPipeline = $True,ValueFromPipelinebyPropertyName = $True)]
    $Message,
    $Component
    )
    Process {

        # Populate the variables to log
        $Time = (Get-Date -Format HH:mm:ss) + ".000+000"
        $Date = Get-Date -Format MM-dd-yyyy
        $TempMsg = "<![LOG[$Message]LOG]!><time=""$Time"" date=""$Date"" component=""$Component"" context="""" type="""" thread="""" file=""$Component"">"
        # Create the component log entry
        Write-Output $TempMsg | Out-File -FilePath $LogFile -Encoding "Default" -Append

    }

}


# Prep logging
$Logfile = "$env:ProgramData\Logs\Software\CopilotRemoval.log"
If((Test-Path "$env:ProgramData\Logs\Software" ) -eq $False) { New-Item  "$env:ProgramData\Logs\Software" -ItemType Directory -Force }

$SystemProfiles = 'S-1-5-18', 'S-1-5-19', 'S-1-5-20'
$UserProfileRegistryKey = 'Registry::HKEY_LOCAL_MACHINE\SOFTWARE\Microsoft\Windows NT\CurrentVersion\ProfileList'
$UserProfilesDirectory = Get-ItemProperty -LiteralPath $UserProfileRegistryKey -Name 'ProfilesDirectory' -ErrorAction 'Stop' | Select-Object -ExpandProperty 'ProfilesDirectory'
$DefaultProfileDirectory = Get-ItemProperty -LiteralPath $UserProfileRegistryKey -Name 'Default' -ErrorAction 'Stop' | Select-Object -ExpandProperty 'Default'

[array]$UserProfiles = @(Get-ChildItem -LiteralPath $UserProfileRegistryKey -ErrorAction 'Stop' | ForEach-Object {

    Get-ItemProperty -LiteralPath $_.PSPath -ErrorAction 'Stop' | Where-Object { $null -ne $_.ProfileImagePath -and $SystemProfiles -notcontains $_.PSChildName } |
    Select-Object  @{ Label = 'SID'; Expression = { $_.PSChildName } }, @{ Label = 'ProfilePath'; Expression = { $_.ProfileImagePath } }

})
$UserProfiles = $UserProfiles | Where-Object { $_ -like "*\Users\*" }
$UserProfiles += New-Object -TypeName PSObject -Property @{SID="NA"; ProfilePath="$DefaultProfileDirectory" }

ForEach ($script:UserProfile in $UserProfiles) {

    $UserName = $UserProfile.ProfilePath.Replace("$UserProfilesDirectory\","")

    Write-Log "<====== Prepping $UserName to remove Copilot PWA ======>"

    Write-Log "STEP 1 - Attempting to load $UserName's HKCU hive"
    # Expected user registry key if user is logged in
    $HKEY_UserPath = "Registry::HKEY_USERS\$($UserProfile.SID)"

    # Create the path to the user's ntuser.dat
    $NTUserPath = $UserProfile.ProfilePath + '\' + 'NTUSER.DAT'

    # Load ntuser.dat file if user is not logged in (should be expected behavior during the in-place upgrade)
    If((Test-Path -LiteralPath $HKEY_UserPath) -eq $False -or $($UserProfile.SID) -eq "N/A") {
        
        # Check that the ntuser.dat path is valid
        If(Test-Path $NTUserPath) {

            # Attempt to load the user's registry
            Try {

                Write-Log "Loading $NTUserPath"
                Start-Process "$env:windir\System32\reg.exe" -ArgumentList "load `"HKEY_USERS\$($UserProfile.SID)`" `"$NTUserPath`"" -PassThru -NoNewWindow -Wait

            }
            Catch {
               
                Write-Log "Failed to load $NTUserPath !"
                Write-Log "Failed Message: $($_.Exception.Message)"
                Write-Log "Failed in Line Number: $($_.InvocationInfo.ScriptLineNumber)"

                [GC]::Collect()
                [GC]::WaitForPendingFinalizers()
                Start-Sleep -Seconds 5

                Write-Log "Unloading $NTUserPath"
                Start-Process "$env:windir\System32\reg.exe" -ArgumentList "unload `"HKEY_USERS\$($UserProfile.SID)`"" -PassThru -NoNewWindow -Wait
                Return

            }

            # Adding Custom Settings
            Write-Log "STEP 2 - Configure Custom Settings"

            # Disable Copilot PWA
            Try {

                Write-Log "Prevent Copilot PWA from installing"
                If(!(Test-Path -LiteralPath "Registry::HKEY_USERS\$($UserProfile.SID)\Software\Microsoft\Windows\CurrentVersion\Explorer\AutoInstalledPWAs")) {

                    New-Item "Registry::HKEY_USERS\$($UserProfile.SID)\Software\Microsoft\Windows\CurrentVersion\Explorer\AutoInstalledPWAs" -Force

                }
                New-ItemProperty -LiteralPath "Registry::HKEY_USERS\$($UserProfile.SID)\Software\Microsoft\Windows\CurrentVersion\Explorer\AutoInstalledPWAs" -Name 'CopilotPWAPreinstallRetryCount' -Value 1 -PropertyType DWord -Force -ErrorAction Stop
                New-ItemProperty -LiteralPath "Registry::HKEY_USERS\$($UserProfile.SID)\Software\Microsoft\Windows\CurrentVersion\Explorer\AutoInstalledPWAs" -Name 'CopilotPWAPreinstallCompleted' -Value 1 -PropertyType DWord -Force -ErrorAction Stop
                New-ItemProperty -LiteralPath "Registry::HKEY_USERS\$($UserProfile.SID)\Software\Microsoft\Windows\CurrentVersion\Explorer\AutoInstalledPWAs" -Name 'Microsoft.Copilot_8wekyb3d8bbwe' -Value 1 -PropertyType DWord -Force -ErrorAction Stop
            
            }
            Catch {

                Write-Log "Failed to prevent Copilot PWA from installing"

            }

            # Attempt to unload the user's registry
            Try {

                [GC]::Collect()
                [GC]::WaitForPendingFinalizers()
                Start-Sleep -Seconds 5
                Write-Log "Unloading $NTUserPath"
                Start-Process "$env:windir\System32\reg.exe" -ArgumentList "unload `"HKEY_USERS\$($UserProfile.SID)`"" -PassThru -NoNewWindow -Wait

            }
            Catch {

                Write-Log "Failed to unload $NTUserPath !"
                Write-Log "Failed Message: $($_.Exception.Message)"
                Write-Log "Failed in Line Number: $($_.InvocationInfo.ScriptLineNumber)"
                Continue

            }

        }

    }
    Else {

        # Take care of profiles that are currently loaded and logged in
        Write-Log "$UserName is logged in!  Will skip loading ntuser.dat and make changes directly in HKEY_USERS\$($UserProfile.SID)"

        # Adding additional Windows 11 customizations
        Write-Log "STEP 2 - Configure Custom Settings"

        # Disable Copilot PWA
        Try {

            Write-Log "Prevent Copilot PWA from installing"
            If(!(Test-Path -LiteralPath "Registry::HKEY_USERS\$($UserProfile.SID)\Software\Microsoft\Windows\CurrentVersion\Explorer\AutoInstalledPWAs")) {

                New-Item "Registry::HKEY_USERS\$($UserProfile.SID)\Software\Microsoft\Windows\CurrentVersion\Explorer\AutoInstalledPWAs" -Force

            }
            New-ItemProperty -LiteralPath "Registry::HKEY_USERS\$($UserProfile.SID)\Software\Microsoft\Windows\CurrentVersion\Explorer\AutoInstalledPWAs" -Name 'CopilotPWAPreinstallRetryCount' -Value 1 -PropertyType DWord -Force -ErrorAction Stop
            New-ItemProperty -LiteralPath "Registry::HKEY_USERS\$($UserProfile.SID)\Software\Microsoft\Windows\CurrentVersion\Explorer\AutoInstalledPWAs" -Name 'CopilotPWAPreinstallCompleted' -Value 1 -PropertyType DWord -Force -ErrorAction Stop
            New-ItemProperty -LiteralPath "Registry::HKEY_USERS\$($UserProfile.SID)\Software\Microsoft\Windows\CurrentVersion\Explorer\AutoInstalledPWAs" -Name 'Microsoft.Copilot_8wekyb3d8bbwe' -Value 1 -PropertyType DWord -Force -ErrorAction Stop
            
        }
        Catch {

            Write-Log "Failed to prevent Copilot PWA from installing"

        }

    }

    Write-Log "<====== $UserName has been updated successfully ======>"

}

Automatically update your Configuration Manager boot images for CVE-2023-24932

As many of you know, CVE-2023-24932 will require Configuration Manager admins to update their boot media before their organization or Microsoft enforces the revocations. If you do not update your boot images before the revocations are applied, you will not be able to load an unpatched WinPE image. Community members like Gary Blok and Sassan Fanai have already shared some excellent scripts that will automatically update your boot image. I just wanted to take it an extra step by automating some of the manual steps that would have to be performed. Using the ConfigMgr Module, we’re able to query the boot images to determine which updates are needed, find the update source URL for the May CU, then eventually update the boot image and reload the boot image properties so the console shows the correct build number. This will hopefully streamline the process for the community.

Credit:

Many thanks to Gary Blok for collaborating with me and helping improve the script!

References:

Requirements:

  • The Configuration Manager module needs to be loaded before running the script
  • If you have a Windows 11 boot image, please run the script on a Windows 11 host. DISM fails to apply the update if you do not.

Parameters:

  • WIMFolder
    • Local folder that will be used to store the boot image WIM temporarily
  • MountFolder
    • Local folder where we will mount the boot image.
  • DownloadFolder
    • Local folder that will be used to store the downloaded May 2023 Cumulative Update

Script:

Convert-CMAppToIntuneWin Function

The following function will automatically convert your ConfigMgr applications to .intunewin files that can be used in Intune to deploy Win32 applications. In my environment, we are using PSADT (Powershell App Deployment Toolkit) so this function worked great to convert my existing install scripts to something that I can use in Intune. Once the function has completed converting your applications, it will open the folder that will contain a subfolder for each Deployment Type that the application had. In those subfolders, you will find the .intunewin files.

Just keep in mind that if your install command in ConfigMgr is calling a file that is not in the content source path, the Convert-CMAppToIntune function will exit since the Win32 Content Prep Tool requires the setup file to exist with the content.

Requirements:

  • Internet Connection (this is required to download the Win32 Content Prep Tool from Microsoft’s official Github repository)
  • The setup file that you are calling in the install command must reside in the content source path.
  • You must be trying to convert a Win32 application install
  • ConfigMgr Module (Click here to learn how to load the module)

Parameters:

  • AppName (Required)
    • You will have to use the exact application name that you are using in ConfigMgr
  • OutputFolder (Optional)
    • By default the function will stage everything into your %TEMP% folder. However you can use this parameter to override that default location and stage your converted files anywhere.

Examples:

Convert-CMAppToIntuneWin -AppName "Google Chrome"
Convert-CMAppToIntuneWin -AppName "VLC Media Player" -OutputFolder "D:\Intune"

Convert all of the applications in your ConfigMgr console:

Get-CMApplication | ForEach-Object { Write-Host "Converting $($_.LocalizedDisplayName)" ; Convert-CMAppToIntuneWin -AppName $_.LocalizedDisplayName }

Script:

Support Tool – WPF Form

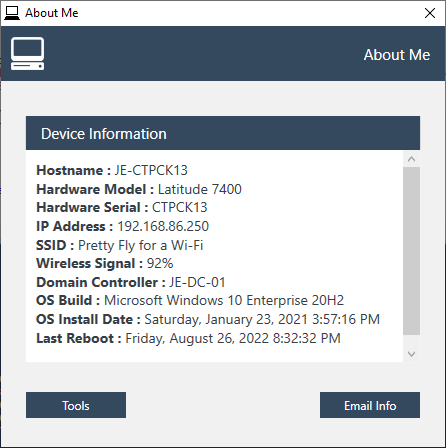
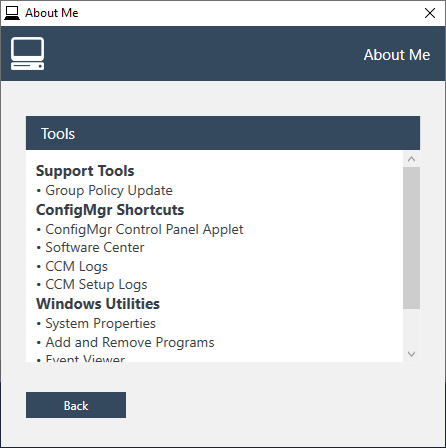
It’s been a while since my last post but I just wanted to share something that I have been working on. Lately I have been trying to migrate all of my WinForms to WPF with Powershell and since I have started learning how to create WPF forms , I wanted to share a tool that I created called “About Me”. This tool will give your users common information that support would need to assist them. If Outlook is installed, it will give users the ability to draft an email automatically with the information that is displayed in the tool. I also have included a “Tools” section that has some shortcuts to commonly used utilities in the OS.

Device Information: This is the first section that users will see when launching the About Me WPF tool. If you have Outlook installed, you will see the Email Info button. Otherwise you will only see a Copy Info button instead which will place the device information into the user’s clipboard.


Tools Section: This is the tools section that users will see when they click the Tools button. This will give users and support the ability to run gpupdate and launch commonly used operating system utilities.

Read more

Automatically download Enablement Packages

Happy New Years everyone! I was recently reading a blog post by Gary Blok that explained how to upgrade to Windows 10 21H2 via Enablement Package using the ConfigMgr App Model. It is a great article and I actually plan on using an Enablement Package to upgrade all of my 20H2 PC’s to 21H2. However, due to my anxiety I didn’t like that I actually had to setup an ADR to download the Enablement Package. So instead of using an ADR, I wanted to see if I could accomplish this with the ConfigMgr Powershell CMDLETs. Fortunately with ConfigMgr 2107, Microsoft released a new CMDLET Get-CMSoftwareUpdateContentInfo that can help us easily retrieve the source path for the Enablement Package .cab files. All you need to make this work is a site with 2107 installed, ConfigMgr console installed on the device that you are running the script, Powershell 3.0 and above, and the following Products and Classifications:

Product: Windows 10

Classification: Upgrades

Powershell Script:

$DownloadFolder = "$env:TEMP\Enablement Packages"

If(!(Test-Path "$DownloadFolder")) { New-Item "$DownloadFolder" -ItemType Directory -Force }

Get-CMSoftwareUpdate -Fast | Where-Object { $_.LocalizedDisplayName -like "*Enablement Package" } | ForEach-Object {

    $SourceURL = (Get-CMSoftwareUpdateContentInfo -Id $_.CI_ID).SourceURL
    $LocalizedDisplayName = $_.LocalizedDisplayName -replace '(?= via Enablement Package).*',''

    If(!(Test-Path "$DownloadFolder\$LocalizedDisplayName")) { New-Item "$DownloadFolder\$LocalizedDisplayName" -ItemType Directory -Force }
    Invoke-WebRequest -Uri $SourceURL -OutFile "$DownloadFolder\$LocalizedDisplayName\$(($SourceURL -replace '.*([/])','').Split('_')[0]).cab"

}

Start $DownloadFolder

How to detect the Log4Shell vulnerability with Powershell

Recently I found a few solutions online that demonstrate how system administrators can detect the Log4Shell vulnerability with Powershell.

Example:

These scripts were great but I noticed they depended on Get-ChildItem to find .jar files on systems. As you may know, Get-ChildItem can be VERY slow to run. Especially when you are scanning entire drives for specific files. That’s when I decided to find an alternative that could run faster and use less resources. I first tried to use .Net but unfortunately that didn’t go anywhere because the EnumerationOptions class is not available to use with Powershell 5.0. Then I started searching Google for other options and someone on StackOverFlow recommended using RoboCopy without copying anything instead. Let’s just say I ended up canceling Get-ChildItem because it was still running after RoboCopy finished querying all of my drives for .jar files.

As you can see in the script, I also decided to not depend on a text file from GitHub that the other scripts were using (https://github.com/mubix/CVE-2021-44228-Log4Shell-Hashes/raw/main/sha256sums.txt). It’s great that it was grabbing the latest .txt file but I didn’t feel comfortable using a file that could possibly be compromised at a later time. Instead I encoded the text file and decoded it so the script can be 100% standalone without any external dependencies.

Update 12/17/2021 – Since I have received a few requests to add custom file hashes, I have updated the script so you can easily add additional file hashes that the script can query. In order to do this, you will need to add the file hashes to the $CustomFileHashes variable.

Example on how to add additional file hashes:

$CustomFileHashes = @(
"9da0f5ca7c8eab693d090ae759275b9db4ca5acdbcfe4a63d3871e0b17367463"
"006fc6623fbb961084243cfc327c885f3c57f2eba8ee05fbc4e93e5358778c85"
)

Well here is the script that you were waiting for. Hopefully it helps!

$CustomFileHashes = @(

)

Remove-Variable List,TotalResults -Force -ErrorAction SilentlyContinue
 
$Drives = (Get-PSDrive -PSProvider FileSystem | Where-Object { $_.Used -gt 0 }).Root
 
$List = ForEach($Drive in $Drives) {
  
    Robocopy $Drive 'Dest' *.jar /l /njh /njs /ndl /ns /nc /fp /e /xj
  
}
 
$EncodedHashes = "IyAyLlggdmVyc2lvbnMKCmJmNGY0MTQwMzI4MGMxYjExNTY1MGQ0NzBmOWIyNjBhNWM5MDQyYzA0ZDliY2MyYTZjYTUwNGE2NjM3OWIyZDYgIC4vYXBhY2hlLWxvZzRqLTIuMC1hbHBoYTItYmluL2xvZzRqLWNvcmUtMi4wLWFscGhhMi5qYXIKNThlOWY3MjA4MWVmZmY5YmRhYWJkODJlM2IzZWZlNWIxYjlmMTY2NmNlZmUyOGY0MjlhZDcxNzZhNmQ3NzBhZSAgLi9hcGFjaGUtbG9nNGotMi4wLWJldGExLWJpbi9sb2c0ai1jb3JlLTIuMC1iZXRhMS5qYXIKZWQyODVhZDVhYzZhOGNmMTM0NjFkNmMyODc0ZmRjZDNiZjY3MDAyODQ0ODMxZjY2ZTIxYzJkMGFkZGE0M2ZhNCAgLi9hcGFjaGUtbG9nNGotMi4wLWJldGEyLWJpbi9sb2c0ai1jb3JlLTIuMC1iZXRhMi5qYXIKZGJmODhjNjIzY2MyYWQ5OWQ4MmZhNGM1NzVmYjEwNWUyMDgzNDY1YTQ3Yjg0ZDY0ZTJlMWE2M2UxODNjMjc0ZSAgLi9hcGFjaGUtbG9nNGotMi4wLWJldGEzLWJpbi9sb2c0ai1jb3JlLTIuMC1iZXRhMy5qYXIKYTM4ZGRmZjFlNzk3YWRiMzlhMDg4NzY5MzJiYzI1MzhkNzcxZmY3ZGIyMzg4NWZiODgzZmVjNTI2YWZmNGZjOCAgLi9hcGFjaGUtbG9nNGotMi4wLWJldGE0LWJpbi9sb2c0ai1jb3JlLTIuMC1iZXRhNC5qYXIKN2Q4Njg0MTQ4OWFmZDEwOTc1NzZhNjQ5MDk0YWUxZWZiNzliMzE0N2NkMTYyYmEwMTk4NjFkZmFkNGU5NTczYiAgLi9hcGFjaGUtbG9nNGotMi4wLWJldGE1LWJpbi9sb2c0ai1jb3JlLTIuMC1iZXRhNS5qYXIKNGJmYjBkNTAyMmRjNDk5OTA4ZGE0NTk3ZjNlMTlmOWY2NGQzY2M5OGNlNzU2YTIyNDljNzIxNzlkM2Q3NWM0NyAgLi9hcGFjaGUtbG9nNGotMi4wLWJldGE2LWJpbi9sb2c0ai1jb3JlLTIuMC1iZXRhNi5qYXIKNDczZjE1YzA0MTIyZGFkODEwYzkxOWIyZjM0ODRkNDY1NjBmZDJkZDQ1NzNmNjY5NWQzODcxOTU4MTZiMDJhNiAgLi9hcGFjaGUtbG9nNGotMi4wLWJldGE3LWJpbi9sb2c0ai1jb3JlLTIuMC1iZXRhNy5qYXIKYjNmYWU0Zjg0ZDQzMDNjZGJhZDQ2OTY1NTRiNGU4ZDIzODFhZDNmYWY2ZTBjM2M4ZDJjZTYwYTQzODhjYWEwMiAgLi9hcGFjaGUtbG9nNGotMi4wLWJldGE4LWJpbi9sb2c0ai1jb3JlLTIuMC1iZXRhOC5qYXIKZGNkZTYwMzNiMjA1NDMzZDZlOTg1NWM5Mzc0MGY3OTg5NTFmYTNhM2YyNTIwMzVhNzY4ZDlmMzU2ZmRlODA2ZCAgLi9hcGFjaGUtbG9nNGotMi4wLWJldGE5LWJpbi9sb2c0ai1jb3JlLTIuMC1iZXRhOS5qYXIKODUzMzhmNjk0Yzg0NGM4YjY2ZDhhMWI5ODFiY2YzODYyN2Y5NTU3OTIwOWIyNjYyMTgyYTAwOWQ4NDllMWE0YyAgLi9hcGFjaGUtbG9nNGotMi4wLWJpbi9sb2c0ai1jb3JlLTIuMC5qYXIKZGIzOTA2ZWRhZDYwMDlkMTg4NmVjMWUyYTE5ODI0OWI2ZDk5ODIwYTM1NzVmOGVjODBjNmNlNTdmMDhkNTIxYSAgLi9hcGFjaGUtbG9nNGotMi4wLXJjMS1iaW4vbG9nNGotY29yZS0yLjAtcmMxLmphcgplYzQxMWEzNGZlZTQ5NjkyZjE5NmU0ZGMwYTkwNWIyNWQwNjY3ODI1OTA0ODYyZmRiYTE1M2RmNWU1MzE4M2UwICAuL2FwYWNoZS1sb2c0ai0yLjAtcmMyLWJpbi9sb2c0ai1jb3JlLTIuMC1yYzIuamFyCmEwMGE1NGUzZmI4Y2I4M2ZhYjM4Zjg3MTRmMjQwZWNjMTNhYjljNDkyNTg0YWE1NzFhZWM1ZmM3MWI0ODczMmQgIC4vYXBhY2hlLWxvZzRqLTIuMC4xLWJpbi9sb2c0ai1jb3JlLTIuMC4xLmphcgpjNTg0ZDEwMDA1OTFlZmEzOTEzODYyNjRlMGQ0M2VjMzVmNGRiYjE0NmNhZDkzOTBmNzMzNThkOWM4NGVlNzhkICAuL2FwYWNoZS1sb2c0ai0yLjAuMi1iaW4vbG9nNGotY29yZS0yLjAuMi5qYXIKOGJkYjY2Mjg0M2MxZjRiMTIwZmI0YzI1YTU2MzYwMDgwODU5MDBjZGY5OTQ3YjFkYWRiOWI2NzJlYTYxMzRkYyAgLi9hcGFjaGUtbG9nNGotMi4xLWJpbi9sb2c0ai1jb3JlLTIuMS5qYXIKYzgzMGNkZThmOTI5YzM1ZGFkNDJjYmRiNmIyODQ0N2RmNjljZWZmZTk5OTM3YmY0MjBkMzI0MjRkZjRkMDc2YSAgLi9hcGFjaGUtbG9nNGotMi4yLWJpbi9sb2c0ai1jb3JlLTIuMi5qYXIKNmFlM2IwY2I2NTdlMDUxZjk3ODM1YTY0MzJjMmIwZjUwYTY1MWIzNmI2ZDRhZjM5NWJiZTkwNjBiYjRlZjRiMiAgLi9hcGFjaGUtbG9nNGotMi4zLWJpbi9sb2c0ai1jb3JlLTIuMy5qYXIKNTM1ZTE5YmYxNGQ4Yzc2ZWMwMGE3ZTg0OTAyODdjYTJlMjU5N2NhZTJkZTViOGYxZjY1ZWI4MWVmMWMyYTRjNiAgLi9hcGFjaGUtbG9nNGotMi40LWJpbi9sb2c0ai1jb3JlLTIuNC5qYXIKNDJkZTM2ZTYxZDQ1NGFmZmY1ZTUwZTY5MzA5NjFjODViNTVkNjgxZTIzOTMxZWZkMjQ4ZmQ5YjliOTI5NzIzOSAgLi9hcGFjaGUtbG9nNGotMi40LjEtYmluL2xvZzRqLWNvcmUtMi40LjEuamFyCjRmNTNlNGQ1MmVmY2NjZGM0NDYwMTc0MjZjMTUwMDFiYjBmZTQ0NGM3YTZjZGM5OTY2Zjg3NDFjZjIxMGQ5OTcgIC4vYXBhY2hlLWxvZzRqLTIuNS1iaW4vbG9nNGotY29yZS0yLjUuamFyCmRmMDAyNzcwNDUzMzhjZWFhNmY3MGE3YjhlZWUxNzg3MTBiM2JhNTFlYWMyOGMxMTQyZWM4MDIxNTc0OTJkZTYgIC4vYXBhY2hlLWxvZzRqLTIuNi1iaW4vbG9nNGotY29yZS0yLjYuamFyCjI4NDMzNzM0YmQ5ZTMxMjFlMGEwYjc4MjM4ZDUxMzE4MzdiOWRiZTI2ZjFhOTMwYmM4NzJiYWQ0NGU2OGU0NGUgIC4vYXBhY2hlLWxvZzRqLTIuNi4xLWJpbi9sb2c0ai1jb3JlLTIuNi4xLmphcgpjZjY1ZjBkMzM2NDBmMmNkMGEwYjA2ZGQ4NmE1YzYzNTM5MzhjY2IyNWY0ZmZkMTQxMTZiNDg4NDE4MWUwMzkyICAuL2FwYWNoZS1sb2c0ai0yLjYuMi1iaW4vbG9nNGotY29yZS0yLjYuMi5qYXIKNWJiODRlMTEwZDVmMThjZWU0NzAyMWEwMjRkMzU4MjI3NjEyZGQ2ZGFjN2I5N2ZhNzgxZjg1YzZhZDNjY2VlNCAgLi9hcGFjaGUtbG9nNGotMi43LWJpbi9sb2c0ai1jb3JlLTIuNy5qYXIKY2NmMDJiYjkxOWUxYTQ0YjEzYjM2NmVhMWIyMDNmOTg3NzI2NTA0NzVmMmEwNmU5ZmFjNGIzYzk1N2E3YzNmYSAgLi9hcGFjaGUtbG9nNGotMi44LWJpbi9sb2c0ai1jb3JlLTIuOC5qYXIKODE1YTczZTIwZTkwYTQxMzY2MmVlZmU4NTk0NDE0Njg0ZGYzZDU3MjNlZGNkNzYwNzBlMWE1YWVlODY0NjE2ZSAgLi9hcGFjaGUtbG9nNGotMi44LjEtYmluL2xvZzRqLWNvcmUtMi44LjEuamFyCjEwZWYzMzExMTVjYmJkMThiNWJlM2YzNzYxZTA0NjUyM2Y5Yzk1YzEwMzQ4NDA4MmIxOGU2N2E3YzM2ZTU3MGMgIC4vYXBhY2hlLWxvZzRqLTIuOC4yLWJpbi9sb2c0ai1jb3JlLTIuOC4yLmphcgpkYzgxNWJlMjk5ZjgxYzE4MGFhOGQyOTI0ZjFiMDE1ZjJjNDY2ODZlODY2YmM0MTBlNzJkZTc1ZjdjZDQxYWFlICAuL2FwYWNoZS1sb2c0ai0yLjkuMC1iaW4vbG9nNGotY29yZS0yLjkuMC5qYXIKOTI3NWY1ZDU3NzA5ZTIyMDQ5MDBkM2RhZTI3MjdmNTkzMmY4NWQzODEzYWQzMWM5ZDM1MWRlZjAzZGQzZDAzZCAgLi9hcGFjaGUtbG9nNGotMi45LjEtYmluL2xvZzRqLWNvcmUtMi45LjEuamFyCmYzNWNjYzk5Nzg3OTdhODk1ZTViZWU1OGZhOGMzYjdhZDZkNWVlNTUzODZlOWU1MzJmMTQxZWU4ZWQyZTkzN2QgIC4vYXBhY2hlLWxvZzRqLTIuMTAuMC1iaW4vbG9nNGotY29yZS0yLjEwLjAuamFyCjUyNTY1MTdlNjIzN2I4ODhjNjVjODY5MWYyOTIxOWI2NjU4ZDgwMGMyM2U4MWQ1MTY3YzRhOGJiZDJhMGRhYTMgIC4vYXBhY2hlLWxvZzRqLTIuMTEuMC1iaW4vbG9nNGotY29yZS0yLjExLjAuamFyCmQ0NDg1MTc2YWVhNjdjYzg1ZjVjY2M0NWJiNjYxNjZmOGJmYzcxNWFlNGE2OTVmMGQ4NzBhMWY4ZDg0OGNjM2QgIC4vYXBhY2hlLWxvZzRqLTIuMTEuMS1iaW4vbG9nNGotY29yZS0yLjExLjEuamFyCjNmY2M0YzFmMmY4MDZhY2ZjMzk1MTQ0Yzk4YjhiYTJhODBmZTFiZjVlM2FkMzM5NzU4OGJiZDI2MTBhMzcxMDAgIC4vYXBhY2hlLWxvZzRqLTIuMTEuMi1iaW4vbG9nNGotY29yZS0yLjExLjIuamFyCjA1N2E0OGZlMzc4NTg2YjY5MTNkMjliNGIxMDE2MmI0YjUwNDUyNzdmMWJlNjZiN2EwMWZiN2UzMGJkMDVlZjMgIC4vYXBhY2hlLWxvZzRqLTIuMTIuMC1iaW4vbG9nNGotY29yZS0yLjEyLjAuamFyCjVkYmQ2YmIyMzgxYmY1NDU2M2VhMTViYzlmYmI2ZDcwOTRlYWY3MTg0ZTY5NzVjNTBmODk5NmY3N2JmYzNmMmMgIC4vYXBhY2hlLWxvZzRqLTIuMTIuMS1iaW4vbG9nNGotY29yZS0yLjEyLjEuamFyCmMzOWIwZWExNGU3NzY2NDQwYzU5ZTVhZTVmNDhhZGVlMDM4ZDliMWM3YTEzNzViMzc2ZTk2NmNhMTJjMjJjZDMgIC4vYXBhY2hlLWxvZzRqLTIuMTMuMC1iaW4vbG9nNGotY29yZS0yLjEzLjAuamFyCjZmMzhhMjU0ODJkODJjZDExOGM0MjU1ZjI1YjlkNzhkOTY4MjFkMjJiYWI0OThjZGNlOWNkYTdhNTYzY2E5OTIgIC4vYXBhY2hlLWxvZzRqLTIuMTMuMS1iaW4vbG9nNGotY29yZS0yLjEzLjEuamFyCjU0OTYyODM1OTkyZTMwMzkyOGFhOTA5NzMwY2UzYTUwZTMxMTA2OGMwOTYwYzcwOGU4MmFiNzY3MDFkYjVlNmIgIC4vYXBhY2hlLWxvZzRqLTIuMTMuMi1iaW4vbG9nNGotY29yZS0yLjEzLjIuamFyCmU1ZTliMGY4ZDcyZjRlN2I5MDIyYjdhODNjNjczMzM0ZDc5Njc5ODExOTFkMmQ5OGY5YzU3ZGM5N2I0Y2FhZTEgIC4vYXBhY2hlLWxvZzRqLTIuMTMuMy1iaW4vbG9nNGotY29yZS0yLjEzLjMuamFyCjY4ZDc5Mzk0MGMyOGRkZmY2NjcwYmU3MDM2OTBkZmRmOWU3NzMxNTk3MGM0MmM0YWY0MGNhNzI2MWE4NTcwZmEgIC4vYXBhY2hlLWxvZzRqLTIuMTQuMC1iaW4vbG9nNGotY29yZS0yLjE0LjAuamFyCjlkYTBmNWNhN2M4ZWFiNjkzZDA5MGFlNzU5Mjc1YjlkYjRjYTVhY2RiY2ZlNGE2M2QzODcxZTBiMTczNjc0NjMgIC4vYXBhY2hlLWxvZzRqLTIuMTQuMS1iaW4vbG9nNGotY29yZS0yLjE0LjEuamFyCjAwNmZjNjYyM2ZiYjk2MTA4NDI0M2NmYzMyN2M4ODVmM2M1N2YyZWJhOGVlMDVmYmM0ZTkzZTUzNTg3NzhjODUgIC4vbG9nNGotMi4wLWFscGhhMS9sb2c0ai1jb3JlLTIuMC1hbHBoYTEuamFy"
[System.Collections.Generic.List[string]]$FileHashes = -split [System.Text.Encoding]::ASCII.GetString([System.Convert]::FromBase64String($EncodedHashes)) | Where-Object {$_.Length -eq 64 }
If($CustomFileHashes -ne $null) { $CustomFileHashes |  ForEach-Object { $FileHashes.Add("$_")} }

$TotalResults = ForEach($Item in $List.Where({$_}).Trim()) {
  
    If($Item.Length -gt 0) {
  
        $Hash = (Get-FileHash -Path $Item -Algorithm SHA256).Hash

            If($FileHashes -contains $Hash) {
  
                $Result = [PSCustomObject]@{
                    "Hostname" = $env:ComputerName
                    "File Hash" = $Hash
                    "File Name" = $Item
                }
  
                $Result
  
            }
  
    }
  
}
$TotalResults

An automated solution for KB5006670 that breaks printer installs

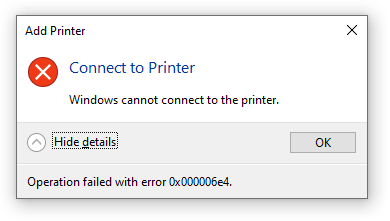
Ever since KB5006670 was released, I have been receiving reports from our local support team that users are unable to install printers from our print servers. The specific error they were getting was “Windows cannot connect to the printer.” Operation failed with error 0x000006e4.

Thanks to a user on Reddit (NinjaAmbush), I was able to find the following fix which was to uncheck “Render print jobs on client computers” click apply and then recheck the setting. Since this had to be done for each printer on the server, I decided to find out if I could automate the steps with Powershell. Fortunately it was pretty straight forward and I was able to accomplish this with two native Powershell CMDLETS (Get-Printer and Set-Printer).

Here is the automated solution that needs to run on your print servers:

Get-Printer -Full | ForEach-Object { 

    If($_.RenderingMode -eq "CSR") {
        
        Set-Printer -Name $_.Name -RenderingMode SSR
        Set-Printer -Name $_.Name -RenderingMode CSR

    }
    If($_.RenderingMode -eq "SSR") {

        Set-Printer -Name $_.Name -RenderingMode CSR
        Set-Printer -Name $_.Name -RenderingMode SSR

    }

}

How to create Outlook holidays with Powershell

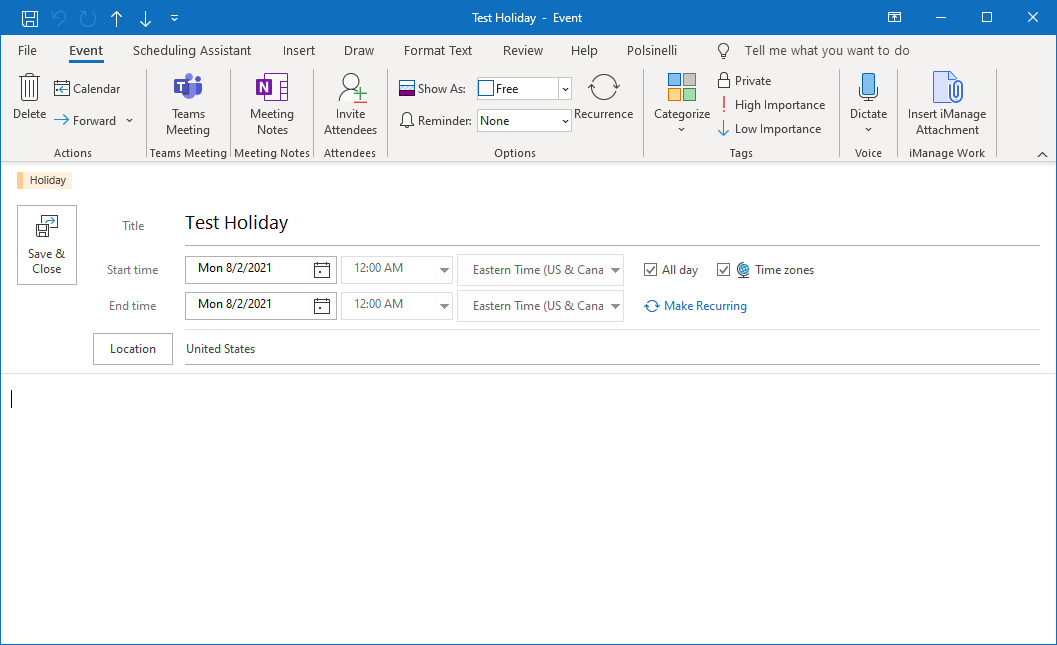
The following script is a proof of concept to demonstrate that you can create Outlook holidays automatically with Powershell. The POC script will automatically create a “Test Holiday” on the date that you ran the script. I also added an IF statement to check if the holiday already exists. That way users wouldn’t see the holiday added multiple times. The script can easily be setup to run in a ForEach loop to add multiple holidays in one script. You would just need to update the $Date and $Subject variables for each holiday.

$Date = (Get-Date).ToShortDateString()
$Subject = "Test Holiday"
$Outlook = New-Object -ComObject Outlook.Application
$NameSpace = $Outlook.GetNameSpace("MAPI")

If($NameSpace.GetDefaultFolder(9).Items.Restrict("[Start] = '$Date 12:00 AM' AND [Subject] = '$Subject'").count -eq 0) {

    $tzs = $Outlook.TimeZones
    $NewEvent = $Outlook.CreateItem(1)
    $NewEvent.Subject = $Subject
    $NewEvent.Start = $Date
    $NewEvent.End = $Date
    $NewEvent.StartTimeZone =$tzs["Central Standard Time"]
    $NewEvent.EndTimeZone = $tzs["Central Standard Time"]
    $NewEvent.Location = "United States"
    $NewEvent.Categories = "Holiday"
    $NewEvent.AllDayEvent = "True"
    $NewEvent.Save()

}

Get-LogonServer Function

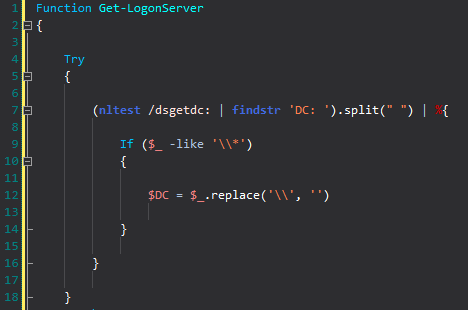
I have noticed in my testing that the %LOGONSERVER% environmental variable can sometimes be unreliable. After searching some time on Google, I found that using the nltest /dsgetdc: command was the most reliable method of returning the logon server. This unfortunately provides some complications since the results of the command also gives additional information that is not needed if you just need the current logon server. This is why I created the following Get-LogonServer function so you could easily return the logon server and use it in a Powershell script.

Function Get-LogonServer {

    Try {

        (nltest /dsgetdc: | findstr 'DC: ').split(" ") | %{
 
	        If($_ -like '\\*'){

			    $DC= $_.replace('\\','')

	        }

        }

    }
    Catch {
        
	    $DC = $False

    }
 
 
    If ($DC){

        $DC

    }
    Else {

        Return $False

    }
  
}

New-ChromeWebApp Function

Use the New-ChromeWebApp Powershell function to automatically create Google Chrome web application shortcuts.

Example: Create a web application shortcut for JoseEspitia.com in the Start Menu

New-ChromeWebApp -Location "C:\ProgramData\Microsoft\Windows\Start Menu\Programs\Jose Espitia.lnk" -URL https://www.JoseEspitia.com -Icon https://www.JoseEspitia.com/favicon.ico

Function:

Function New-ChromeWebApp {

    <#  
 
    .SYNOPSIS Create Chrome Web Applications
 
    .PARAMETER Location - Specify location for the shortcut

    .PARAMETER URL - Specify the web apps URL

    .PARAMETER Icon - Specify location for shortcut icon

    .EXAMPLE - Create JoseEspitia.com web app in All Users start menu
    New-ChromeWebApp -Location "C:\ProgramData\Microsoft\Windows\Start Menu\Programs\Jose Espitia.lnk" -URL https://www.JoseEspitia.com -Icon https://www.JoseEspitia.com/favicon.ico
 
    #>

    param (
        [parameter(Mandatory=$True)]
        [string]$Location,
        [parameter(Mandatory=$True)]
        [string]$URL,
        [parameter(Mandatory=$True)]
        [string]$Icon

    )
    # Get Chrome.exe path
    $ChromeOpenCommand = (Get-ItemProperty Registry::HKCR\ChromeHTML\shell\open\command)."(Default)"
    $ChromeDefaultPath = $ChromeOpenCommand.Substring(0, $ChromeOpenCommand.IndexOf(' --'))

    # Create web app shortcut
    $Shortcut = (New-Object -ComObject WScript.Shell).CreateShortcut("$Location") 
    $Shortcut.TargetPath = "$ChromeDefaultPath"
    $Shortcut.Arguments = "--app=$URL"
    $Shortcut.WorkingDirectory = "C:\Program Files\Google\Chrome\Application"
    $Shortcut.IconLocation = "$Icon"
    $Shortcut.Save()

}
Older Posts »
Page 1 of 6