Scripting

Universal Uninstall and Install Script

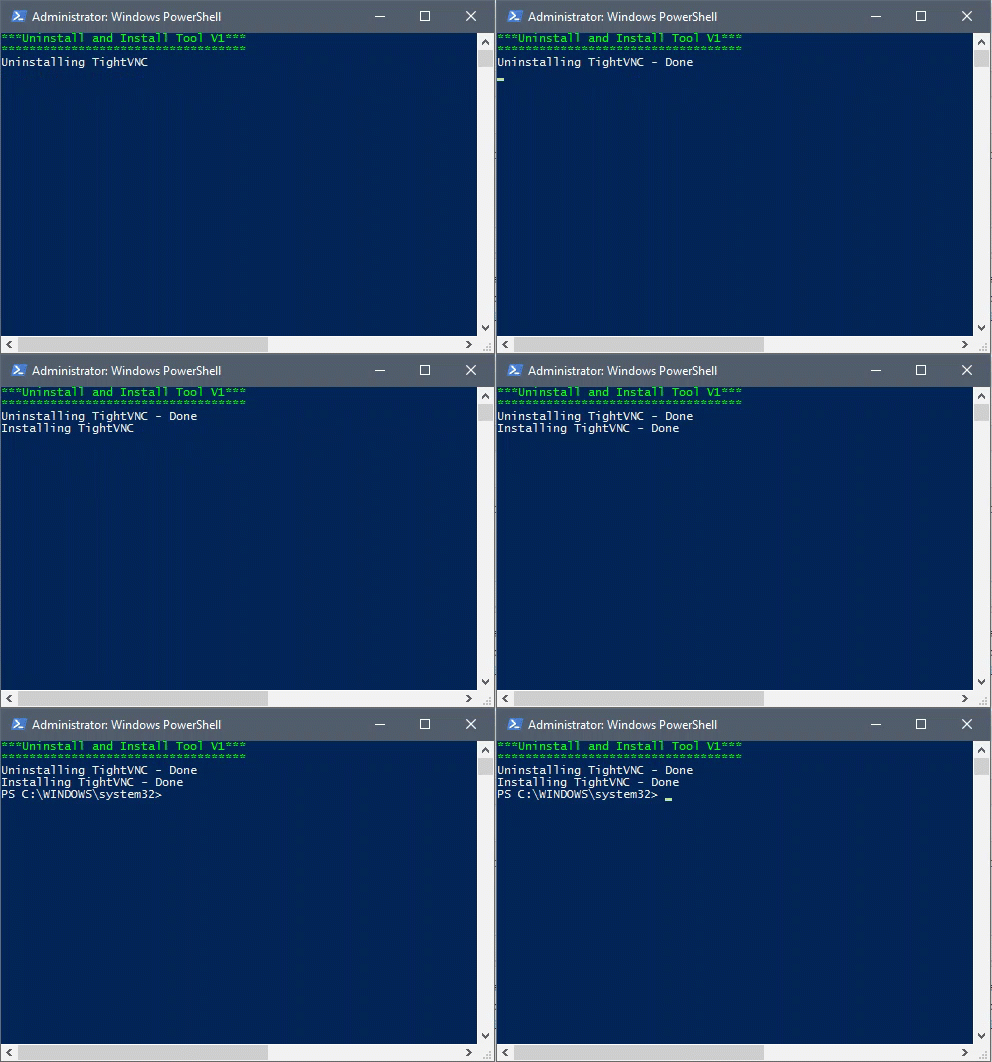
Recently, I decided to make a Powershell script that will make it easier for larger environments to uninstall and upgrade software. This is a continuation of the script that I wrote a while back ago that can find uninstall strings for 32 and 64bit applications (Link). Similar to the previous script, this script will automatically find the uninstall string for the specified program, but now it will also uninstall the program and install an upgraded version with the install file that you picked.

Read more

Launch a hidden Powershell script


This short VBscript will launch a hidden Powershell script without any windows:

command = "powershell.exe -nologo -ExecutionPolicy Unrestricted -File C:\script.ps1"

set shell = CreateObject("WScript.Shell")

shell.Run command,0

Automatically assign Office 365 licenses to new users

We recently setup the Azure Active Directory Sync Tool and noticed that it does not automatically assign licenses to new users. This can be a real pain for a big company so I decided to create a script that will automatically do this for us.
Read more

Get total case number for individual users in CRM 2016

The following SQL query will give you a total count of cases for each individual user in CRM 2016 since April 1st 2015. You can change the date range with the following line: WHERE ca.CreatedOn > ‘DATE HERE’

SELECT us.fullname,
COUNT(*) as [Total Count]

FROM SystemUserBase as us with (nolock)
LEFT JOIN IncidentBase as ca
on us.SystemUserId = ca.OwnerID

WHERE ca.CreatedOn > '2015-04-01'
GROUP BY us.Fullname
ORDER BY [Total Count] desc

Connecting and writing to a SQL DB with Powershell

For this example, we are going update our User Logon Script that you can find here and have it insert data into a SQL database.

First we will need to get our information that we will be inserting into the SQL Database:

$username = $env:USERNAME
$computername = $env:COMPUTERNAME
$ipv4 = Test-Connection -ComputerName (hostname) -Count 1 | foreach { $_.ipv4address } 
$ipv6 = Test-Connection -ComputerName (hostname) -Count 1 | foreach { $_.ipv6address } 
$computermodel = get-wmiobject win32_computersystem | foreach { $_.model } 
$serial = get-wmiobject win32_bios | foreach { $_.serialnumber } 
$action = 'Logon'
$timeformat='MM-dd-yyyy hh:mm:ss tt'
$time = (Get-Date).ToString($timeformat)

Now we will need to start connecting to our SQL Database. In the example we will be using the following SQL information:
SQL Server = SQL-Server-01
Database Name = Comp_Info
Table Name = LogonInfo
Columns = Date and Time,Username,Comptuter Name,IPv4 Address,IPv6 Address,Model,Serial,Action

Now we have to start the SQL database connection:

$connection = New-Object System.Data.SqlClient.SqlConnection
$connection.ConnectionString = "Data Source=SQL-Server-01;Initial Catalog=Comp_Info;Integrated Security=SSPI;"
$connection.Open()

Now we will prepare to insert the data:

$cmd = New-Object System.Data.SqlClient.SqlCommand
$cmd.connection = $connection
$cmd.CommandText = "INSERT INTO LogonInfo ([Date and Time],Username,[Comptuter Name],[IPv4 Address],[IPv6 Address],Model,Serial,Action)
VALUES('{0}','{1}','{2}','{3}','{4}','{5}','{6}','{7}')" -f
$time,$username,$computername,$ipv4,$ipv6,$computermodel,$serial,$action
$cmd.ExecuteNonQuery()

And finally we will execute the query and close the database connection:

$cmd.ExecuteNonQuery()
$connection.Close()

The entire script should look similar to this:

#Gets computer information
$username = $env:USERNAME
$computername = $env:COMPUTERNAME
$ipv4 = Test-Connection -ComputerName (hostname) -Count 1 | foreach { $_.ipv4address } 
$ipv6 = Test-Connection -ComputerName (hostname) -Count 1 | foreach { $_.ipv6address } 
$computermodel = get-wmiobject win32_computersystem | foreach { $_.model } 
$serial = get-wmiobject win32_bios | foreach { $_.serialnumber } 
$action = 'Logon'
$timeformat='MM-dd-yyyy hh:mm:ss tt'
$time = (Get-Date).ToString($timeformat)

#Connects to Database
$connection = New-Object System.Data.SqlClient.SqlConnection
$connection.ConnectionString = "Data Source=SQL-Server-01;Initial Catalog=Comp_Info;Integrated Security=SSPI;"
$connection.Open()

#Inserts information to the DB
$cmd = New-Object System.Data.SqlClient.SqlCommand
$cmd.connection = $connection
$cmd.CommandText = "INSERT INTO LogonInfo ([Date and Time],Username,[Comptuter Name],[IPv4 Address],[IPv6 Address],Model,Serial,Action)
VALUES('{0}','{1}','{2}','{3}','{4}','{5}','{6}','{7}')" -f
$time,$username,$computername,$ipv4,$ipv6,$computermodel,$serial,$action
$cmd.ExecuteNonQuery()

#Closes Connection
$connection.Close()

User Tracking Logon Script

The following script will help you keep track of which machines are being logged into. The script will find the logged in user and it will retrieve basic information about the machine that was used to log in. The logons will be tracked in a CSV that is created daily by the script. To implement this, you can add the script to your GPO and have it run during logon.

The example saves the CSV in the C drive but you can save it anywhere by specifying the directory name in the $directory variable.

#Gets information for the spreadsheet
$username = $env:USERNAME
$computername = $env:COMPUTERNAME
$ipv4 = Test-Connection -ComputerName (hostname) -Count 1 | foreach { $_.ipv4address } 
$ipv6 = Test-Connection -ComputerName (hostname) -Count 1 | foreach { $_.ipv6address } 
$computermodel = get-wmiobject win32_computersystem | foreach { $_.model } 
$serial = get-wmiobject win32_bios | foreach { $_.serialnumber } 
$timeformat='MM-dd-yyyy hh:mm:ss tt'
$time = (Get-Date).ToString($timeformat)
$action = 'Logon'

#Specifies filename, and directory
$directory = "c:\"
$filedate = 'MM-dd-yyyy'
$filename = 'CompInfo' + ' ' + $(Get-Date).ToString($filedate)
$file = "$filename.csv"

#Creates custom table and sorts the information
$table=  New-Object –TypeName PSObject -Property @{
            'Date/Time' = $time
            'Username' = $username
            'ComputerName'= $computername
            'IPv4 Address' = $ipv4
            'IPv6 Address' = $ipv6
            'Model' = $computermodel
            'Serial' = $serial
            'Notes/Action' = $action
} | Select date/time, username, computername, 'IPv4 Address', 'IPv6 Address', model, serial, notes/action 

#Checks if CSV has already been created for the day.
if (Test-path "$directory\$file") {
    
    import-csv -Path "$directory\$file" > null
    $table | Export-Csv -NoTypeInformation -Append -Path "$directory\$file"

}

else{ 
    $table | Export-Csv -NoTypeInformation -Path "$directory\$file" 
} 

How to programmatically pin icons in Windows 10

UPDATE 01/01/2017:
Microsoft finally released an approved method to pin icons to the taskbar. I would highly suggest using this method since Syspin is a 3rd party tool that is not approved.
You can find out more info here:
https://technet.microsoft.com/en-us/itpro/windows/manage/configure-windows-10-taskbar

In previous versions of Windows, you used to be able to use the verb Pintotaskbar to programmatically pin programs to your taskbar.

Example on how to pin Powershell ISE to the taskbar in Windows 8.1:

    $shell = new-object -com "Shell.Application"  
    $folder = $shell.Namespace((Join-Path $env:SystemRoot System32\WindowsPowerShell\v1.0))
    $item = $folder.Parsename('powershell_ise.exe')
    $item.invokeverb('taskbarpin');

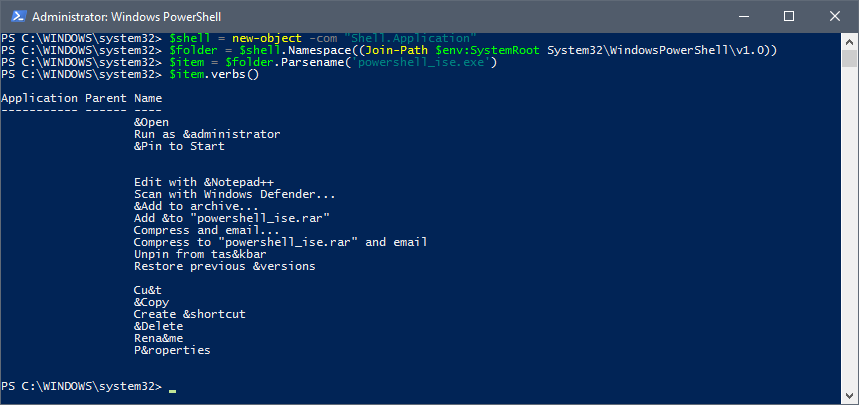
This is no longer the case with Windows 10 and retrieving the verbs with $item.Verbs() from the script above, returns all verbs except for “Pin to taskbar”.  If you right click the file via the GUI, you will see that this verb does indeed exist.

Powershell verb

After a while of researching, I found a great third party tool that can easily pin icons to your taskbar in Windows 10.

The tool is called SysPin and you can download it from the following URL:
http://www.technosys.net/products/utils/pintotaskbar

Below are some instructions on how to use the tool:

Usage : syspin ["file"] c:#### or syspin ["file"] c:"commandstring"
        c:5386  : Pin to Taskbar
        c:5387  : Unpin from Taskbar
        c:51201 : Pin to Start
        c:51394 : Unpin to Start

Samples :
  syspin "%PROGRAMFILES%\Internet Explorer\iexplore.exe" c:5386
  syspin "C:\Windows\notepad.exe" c:"Pin to Taskbar"
  syspin "%WINDIR%\System32\calc.exe" c:"Pin to Start"
  syspin "C:\Windows\System32\calc.exe" c:51201

Unfortunately I haven’t found a way to unpin Edge and the Microsoft App store with this utility but I have been successful using the following tutorial to unpin everything before sysprepping the machine.
http://ccmexec.com/2015/12/removing-the-edge-icon-from-the-taskbar-during-osd/

Good luck and I hope this helps someone!

Windows 10 Upgrade

Depending on your environment, you may or may not need to have prerequisites that need to be done before starting an upgrade. These tasks may include, disabling your antivirus or uninstalling any software that may not be compatible with Windows 10. Once you have automated these tasks you can start the Windows 10 upgrade process by using the following command:

"setup.exe" /auto upgrade /quiet /copylogs %SystemDrive%\Temp\Deployment_Log 

This is a very basic way to silently upgrade your computers to Windows 10.  You can add further customization such as adding a post script that will launch after the upgrade is done.  To do this you can add the /PostOOBE<location>\[setupcomplete.cmd] switch to the command above.

Once you have your scripts ready, you can deploy them with the software that you use to push out your packages (Kaseya, LANDesk, SCCM, etc).

Read more

Uninstall Flash Player

If you are in an environment that has multiple versions of Flash Player, I would recommend using Adobe’s Uninstall Flash Player tool in your Flash Player install script. You can download the uninstall tool here.

Using the following line will uninstall any version of Flash Player that was installed on the computer.

uninstall_flash_player.exe -uninstall

Below is an example script that uninstalls and installs the latest version of Flash Player.

REM Setting Current Directory
cd "%~dp0"

REM Uninstalling Flash
uninstall_flash_player.exe -uninstall

REM Installing Flash
msiexec /i "install_flash_player_21_active_x.msi" /qn /norestart /log "C:\Temp\flashinstall.log" 


IF %ERRORLEVEL% == 0 goto MMS
exit %ERRORLEVEL%

:MMS
REM Copying SilentAutoUpdate Config
IF EXIST %WINDIR%\SysWow64\Macromed\Flash (
    copy /Y mms.cfg %WINDIR%\SysWow64\Macromed\Flash
	copy /Y mms.cfg %WINDIR%\System32\Macromed\Flash
	
) ELSE (
    copy /Y mms.cfg %WINDIR%\System32\Macromed\Flash
)

Windows 10 Sysprep Issue

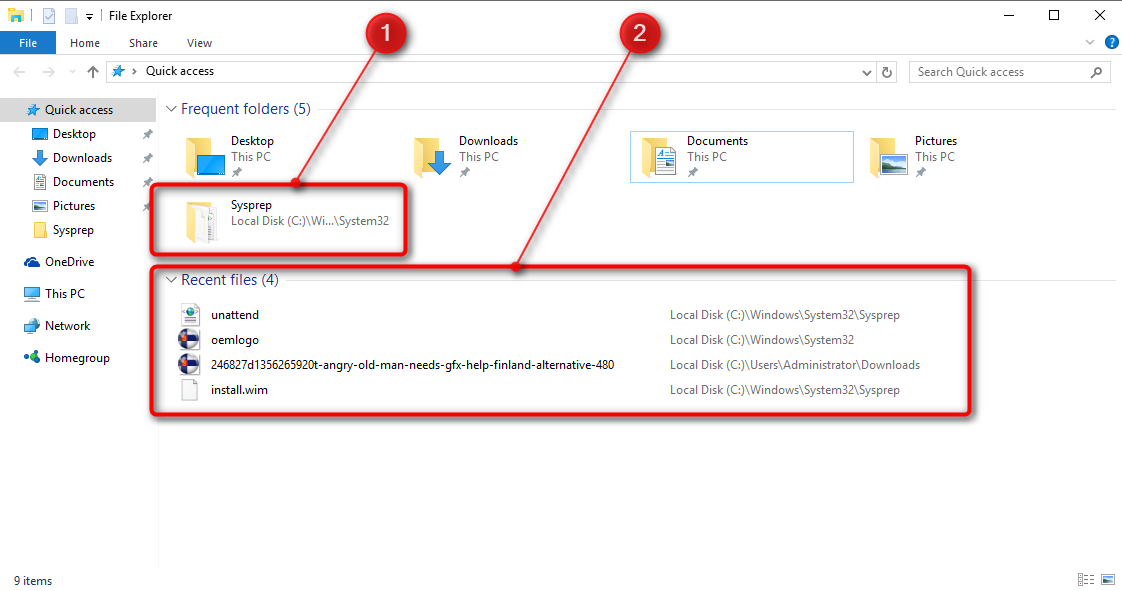
Recently I noticed that when you sysprep Windows 10 and use CopyProfile=TRUE in your unattend.xml, it will copy over the last used folders and recent files of the built-in admin.

Quick Access

In order to remove the Quick Access history, you will need to place a batch file inside the built-in admin’s %appdata%\Microsoft\Windows\Start Menu\Programs\Startup folder in Audit Mode before running Sysprep.

Read more