Scripting

Validate-GroupMembership Powershell Function

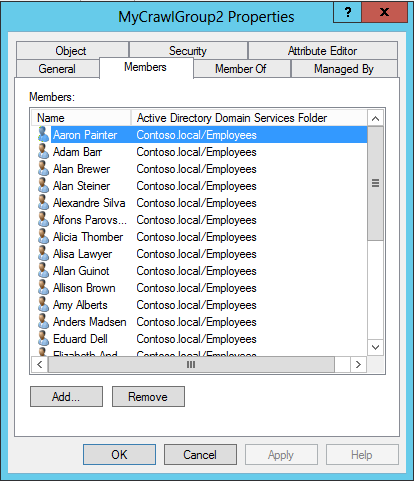
Use the Validate-GroupMembership function to confirm whether or not a user or computer object is a member of an AD group.

Examples:
Find out if the current user is a member of an AD group called “Test Group”
Validate-GroupMembership -SearchString $env:USERNAME -SearchType User -Group “Test Group”

Find out if the current computer is a member of an AD group called “ORL Computers”
Validate-GroupMembership -SearchString $env:COMPUTERNAME -SearchType Computer -Group “ORL Computers”

Function Validate-GroupMembership {

    <#

    .SYNOPSIS
    Validates AD group membership for a user or computer object
  
    .PARAMETER SearchString
    Provide Username or Computer Name
  
    .PARAMETER SearchType
    Specify type (User or Computer)

    .PARAMETER Group
    Provide AD Group name
  
    .EXAMPLE
    Validate-GroupMembership -SearchString $env:USERNAME -SearchType User -Group "Test Group"
  
    .EXAMPLE
    Validate-GroupMembership -SearchString $env:COMPUTERNAME -SearchType Computer -Group "ORL Computers"

    #>

    param (
     [parameter(Mandatory=$True)]
     [ValidateNotNullOrEmpty()]$SearchString,
     [parameter(Mandatory=$True)]
     [ValidateSet("User", "Computer")]
     [ValidateNotNullOrEmpty()]$SearchType,
     [parameter(Mandatory=$true)]
     [ValidateNotNullOrEmpty()]$Group
    )

    Try {

        $objSearcher = New-Object System.DirectoryServices.DirectorySearcher
        $objSearcher.SearchRoot = New-Object System.DirectoryServices.DirectoryEntry

        If ($SearchType -eq "User") {

            $objSearcher.Filter = "(&(objectCategory=User)(SAMAccountName=$SearchString))"

        } 
        Else {

            $objSearcher.Filter = "(&(objectCategory=Computer)(cn=$SearchString))"

        }

        $objSearcher.SearchScope = "Subtree"
        $obj = $objSearcher.FindOne()
        $User = $obj.Properties["distinguishedname"]

        $objSearcher.PageSize=1000
        $objSearcher.Filter = "(&(objectClass=group)(cn=$Group))"
        $obj = $objSearcher.FindOne()

        [String[]]$Members = $obj.Properties["member"]

        If($Members.count -eq 0) {                       

            $retrievedAllMembers=$false           
            $rangeBottom =0
            $rangeTop= 0

            While (! $retrievedAllMembers) {

                $rangeTop=$rangeBottom + 1499               

                $memberRange="member;range=$rangeBottom-$rangeTop"  

                $objSearcher.PropertiesToLoad.Clear()
                [void]$objSearcher.PropertiesToLoad.Add("$memberRange")

                $rangeBottom+=1500

                Try {

                    $obj = $objSearcher.FindOne() 
                    $rangedProperty = $obj.Properties.PropertyNames -like "member;range=*"
                    $Members +=$obj.Properties.item($rangedProperty)          
                   
                        if ($Members.count -eq 0) { $retrievedAllMembers=$true }
                }

                Catch {

                    $retrievedAllMembers=$true
                }

            }
            
        }

    }

    Catch {

        Write-Host "Either group or user does not exist"
        Return $False

    }
   
    If ($Members -contains $User) { 

        Return $True

    }
    Else {

        Return $False

    }

}

Add a new custom Powershell module path

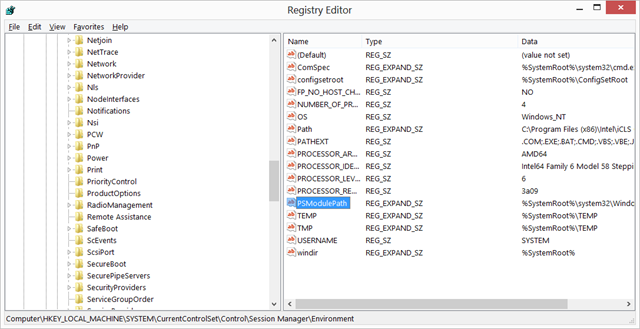
You can use the following script to add a new module path to the PSModulePath environmental variable. Adding modules to this path will allow you to use them in your own scripts and if you have Powershell 3.0+ these modules will be automatically loaded when you call one of the custom CMDLET’s.

Notes:
Please replace the $ModulePath variable with the path that you would like to use.

$ModulePath = "YOUR PATH HERE"
$Path = (Get-ItemProperty -Path "HKLM:\SYSTEM\ControlSet001\Control\Session Manager\Environment").PSModulePath
$NewPath = "$ModulePath" + ";" + $Path

If($Path -notlike "*$ModulePath*") {
    Set-ItemProperty -Path "HKLM:\SYSTEM\ControlSet001\Control\Session Manager\Environment" -Name PSModulePath -Type String -Value "$NewPath"
}

AC Power Check For Laptops

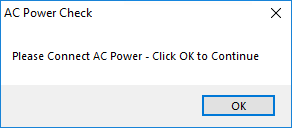
The following script can be used in an SCCM or MDT upgrade task sequence to check if a laptop is connected to a charger. If the script detects that the laptop is not connected to a charger, it will prompt the user to connect the laptop to AC power.

$ChassisTypes = (Get-WmiObject -Class Win32_SystemEnclosure).ChassisTypes

Switch($ChassisTypes) {

    3 { $Chassis = "Desktop" }
    4 { $Chassis = "Desktop" }
    5 { $Chassis = "Desktop" }
    6 { $Chassis = "Desktop" }
    7 { $Chassis = "Desktop" }
    8 { $Chassis = "Laptop" }
    9 { $Chassis = "Laptop" }
    10 { $Chassis = "Laptop" }
    11 { $Chassis = "Laptop" }
    12 { $Chassis = "Laptop" }
    14 { $Chassis = "Laptop" }
    15 { $Chassis = "Desktop" }
    16 { $Chassis = "Desktop" }
    18 { $Chassis = "Laptop" }
    21 { $Chassis = "Laptop" }
    23 { $Chassis = "Server" }
    31 { $Chassis = "Laptop" }

}
If($Chassis -eq "Laptop") {

    Do {
      $PowerStatus = (Get-WmiObject -Class BatteryStatus  -Namespace root\wmi -ErrorAction SilentlyContinue).PowerOnLine

        If($PowerStatus -ne $True) {

            $TSEnv = New-Object -ComObject "Microsoft.SMS.TsProgressUI"
            $TSEnv.CloseProgressDialog()
            $wshell = New-Object -ComObject Wscript.Shell
            $wshell.Popup("Please Connect AC Power - Click OK to Continue",0,"AC Power Check",0)
    
        }
    }
    Until($PowerStatus -eq $True)

}

Silently launch scripts or applications with Hidden.vbs

Do you ever need to launch a process silently? Well you can easily accomplish this task by using Hidden.vbs! You no longer need to hardcode any process related info in your script because you can provide the path in the arguments.

Examples:
Hidden.vbs Powershell.exe -ExecutionPolicy Unrestricted -File C:\IT\PowerShell\PDF_Fix.ps1
Hidden.vbs Install.bat


Download The Script Now!

' //***************************************************************************
' // ***** Script Header *****
' // =======================================================
' // Silently launch a process
' // =======================================================
' //
' // File:      Hidden.vbs
' //
' // Purpose:   To provide a method of launching applications silently
' //
' //
' // ***** End Header *****
' //***************************************************************************

Set objShell = CreateObject("Shell.Application")
Set objWshShell = WScript.CreateObject("WScript.Shell")
Set objArgs = Wscript.Arguments

If (WScript.Arguments.Count >= 1) Then
    strFlag = WScript.Arguments(0)
    If (strFlag = "") OR (strFlag="help") OR (strFlag="/h") OR (strFlag="\h") OR (strFlag="-h") _
        OR (strFlag = "\?") OR (strFlag = "/?") OR (strFlag = "-?") OR (strFlag="h") _
        OR (strFlag = "?") Then
		DisplayUsage
        WScript.Quit
    Else
	ReDim args(WScript.Arguments.Count-1)
	For i = 0 To WScript.Arguments.Count-1
	  If InStr(WScript.Arguments(i), " ") > 0 Then
		args(i) = Chr(34) & WScript.Arguments(i) & Chr(34)
	  Else
		args(i) = WScript.Arguments(i)
	  End If
	Next

	objWshShell.Run Join(args, " "),0	
    End If
Else
    DisplayUsage
    WScript.Quit
End If

Sub DisplayUsage

    WScript.Echo "Silently launch a process" & vbCrLf & _
                 "" & vbCrLf & _
                 "Purpose:" & vbCrLf & _
                 "------------" & vbCrLf & _
                 "To provide a method of launching applications silently" & vbCrLf & _
                 "" & vbCrLf & _
                 "Usage:   " & vbCrLf & _
                 "--------" & vbCrLf & _				 
                 "" & vbCrLf & _
                 "hidden.vbs application <arguments>" & vbCrLf & _
                 "" & vbCrLf & _
                 "" & vbCrLf & _
                 "Sample usage:" & vbCrLf & _
                 "-------------------" & vbCrLf & _				 
                 "" & vbCrLf & _
                 "Hidden.vbs Powershell.exe -ExecutionPolicy Unrestricted -File C:\IT\PowerShell\PDF_Fix.ps1" & vbCrLf & _
                 "" & vbCrLf & _
                 "Hidden.vbs Install.bat" & vbCrLf & _
                 "" & vbCrLf & _
                 "" & vbCrLf

End Sub

Troubleshooting Script for Windows 10 Start Menu Issues

Since a lot of people are having issues with the start menu tiles in their images, I decided to create the following script to help others troubleshoot some common issues that may occur.

Note: This script is compatible with Windows 10 1709 and above.

The script will run through the following checks:

  • Checks to see if C:\Users\Default\AppData\Local\Microsoft\Windows\Shell\LayoutModification.xml exists
  • Checks if the current user’s LayoutModification.xml matches the default profile’s LayoutModification.xml.
  • Opens C:\Users\Default\AppData\Local\Microsoft\Windows\Shell\LayoutModification.xml so you can confirm whether or not this is the XML file that you imported in your OSD process.
  • Checks to see if HKCU:\Software\Microsoft\Windows\CurrentVersion\CloudStore\Store\Cache\DefaultAccount\$start.tilegrid$windows.data.curatedtilecollection.root is causing the issue.


Download The Script Now!

$CurrentUserStartMenu = "$env:LOCALAPPDATA\Microsoft\Windows\Shell\LayoutModification.xml"
$DefaultStartMenu = "C:\Users\Default\AppData\Local\Microsoft\Windows\Shell\LayoutModification.xml"


If((Test-Path "$DefaultStartMenu") -eq $False) {

    Write-Host -ForegroundColor Red "$DefaultStartMenu does not exist!"
    Write-Host -ForegroundColor Green "Possible Solution - Use Import-StartLayout to import your start layout (You will need to login as a new user to see the changes)"
    
    $Prompt = Read-Host -Prompt "Press any key to exit"
        
    If($Prompt -ne $Null) {

        Return

    }

}
Else {

    If((Get-FileHash $CurrentUserStartMenu).hash -ne (Get-FileHash $DefaultStartMenu).hash){

        Write-Host "The default profile layoutmodification.xml and the current user's layoutmodification.xml do not match!" -ForegroundColor Red
        Copy-Item "C:\Users\Default\AppData\Local\Microsoft\Windows\Shell\LayoutModification.xml" "$env:LOCALAPPDATA\Microsoft\Windows\Shell\LayoutModification.xml" -Force
        Remove-Item 'HKCU:\Software\Microsoft\Windows\CurrentVersion\CloudStore\Store\Cache\DefaultAccount\$start.tilegrid$windows.data.curatedtilecollection.root' -Force -Recurse
        Get-Process Explorer | Stop-Process

        $Prompt = Read-Host -Prompt "Is your custom start layout visible when you launch the start menu? (YES, NO)"

        If($Prompt -like "Y*") {

            Write-Host "Solution - Copying the default profile's layoutmodification to $env:LOCALAPPDATA\Microsoft\Windows\Shell\LayoutModification.xml fixed the problem" -ForegroundColor Red
        
            $Prompt = Read-Host -Prompt "Press any key to exit"
        
            If($Prompt -ne $Null) {

                Return

            }

        }
        Else {

            Write-Host "Unable to determine a solution" -ForegroundColor Red
        
            $Prompt = Read-Host -Prompt "Press any key to exit"
        
            If($Prompt -ne $Null) {

                Return

            }

        }


    }

    Write-Host -ForegroundColor Red "Confirm that the default start layout is the same start layout that you imported"
    Start-Process Notepad -ArgumentList "$DefaultStartMenu"

    $Prompt = Read-Host -Prompt "Is this the same layout that you imported? (YES, NO)"

    If($Prompt -like "Y*") {

        Remove-Item 'HKCU:\Software\Microsoft\Windows\CurrentVersion\CloudStore\Store\Cache\DefaultAccount\$start.tilegrid$windows.data.curatedtilecollection.root' -Force -Recurse
        Get-Process Explorer | Stop-Process
        
        $Prompt = Read-Host -Prompt "Is your custom start layout visible when you launch the start menu? (YES, NO)"

            If($Prompt -like "Y*") {

                Write-Host 'Possible Solution - Delete Software\Microsoft\Windows\CurrentVersion\CloudStore\Store\Cache\DefaultAccount\$start.tilegrid$windows.data.curatedtilecollection.root from C:\Users\Default\NTUser.dat' -ForegroundColor Green
                
                $Prompt = Read-Host -Prompt "Press any key to exit"
        
                If($Prompt -ne $Null) {

                    Return

                }

            }
            Else {

                Write-Host "Unable to determine a solution" -ForegroundColor Red
                
                $Prompt = Read-Host -Prompt "Press any key to exit"
        
                If($Prompt -ne $Null) {

                    Return

                }

            }

    }

    Else {
        
        Write-Host "Possible Solution - Replace C:\Users\Default\AppData\Local\Microsoft\Windows\Shell\LayoutModification.xml with your custom LayoutModification.xml(You will need to login as a new user to see the changes)" -ForegroundColor Green
        
        $Prompt = Read-Host -Prompt "Press any key to exit"
        
        If($Prompt -ne $Null) {

            Return

        }

    }

}

How to programmatically configure file associations in Windows 10 and Server 2016 without DISM

If you are reading this, you are most likely aware that Microsoft has changed how you can configure file associations. Pre-Windows 8, we were able to configure file associations by manipulating the registry but now this method does not work because Microsoft verifies a hash key to determine if the change was made by the user.

Until recently, the only way to configure file associations in Windows 10 was to use DISM to import your file associations XML or use a GPO which would lock down your associations. Using the DISM method only worked for new users so any existing users would have to manually configure their file associations. Luckily someone named Christoph Kolbicz has reverse engineered the algorithm used by Microsoft to create the hash key so now we can programmatically configure file associations!

You are probably wondering how you can do this. Well.. Christoph has been kind enough to share a command line tool that he has created and that you can download from his website http://kolbi.cz/blog/?p=346.

How do you use it?
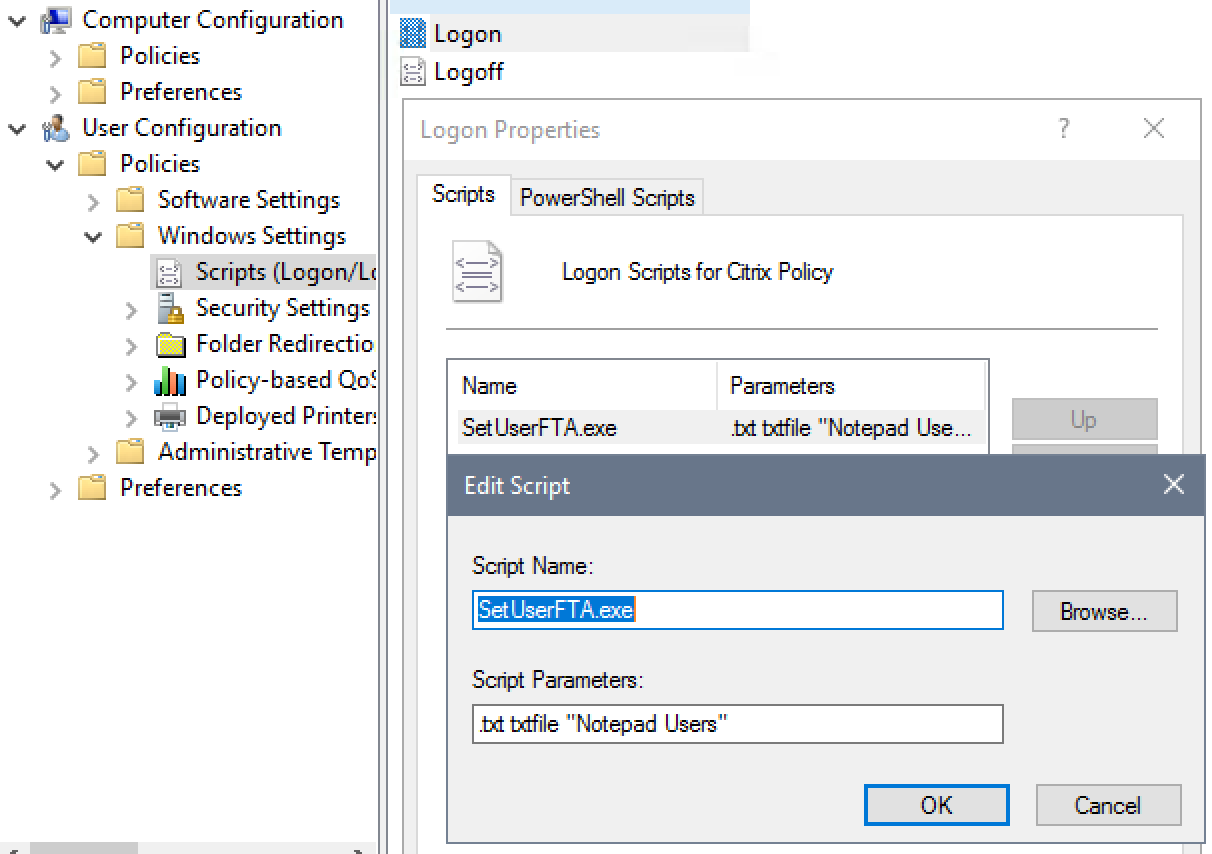
It’s easy! You can just run the following command to make Adobe Reader DC the default pdf reader for the current logged in user:

SetUserFTA.exe .pdf AcroExch.Document.DC

For more information about SetUserFTA.exe goto http://kolbi.cz/blog/?p=346!

How to reset your start menu layout in Windows 10 1709

The following short script will reset your start menu layout back to it’s default configuration.

Remove-Item 'HKCU:\Software\Microsoft\Windows\CurrentVersion\CloudStore\Store\Cache\DefaultAccount\$start.tilegrid$windows.data.curatedtilecollection.root' -Force -Recurse
Get-Process Explorer | Stop-Process

Are you trying to reset the start layout for Windows 10 1809? Click here to find out how.

Removing Duplicate Windows Boot Manager Entries in your MDT Task Sequence

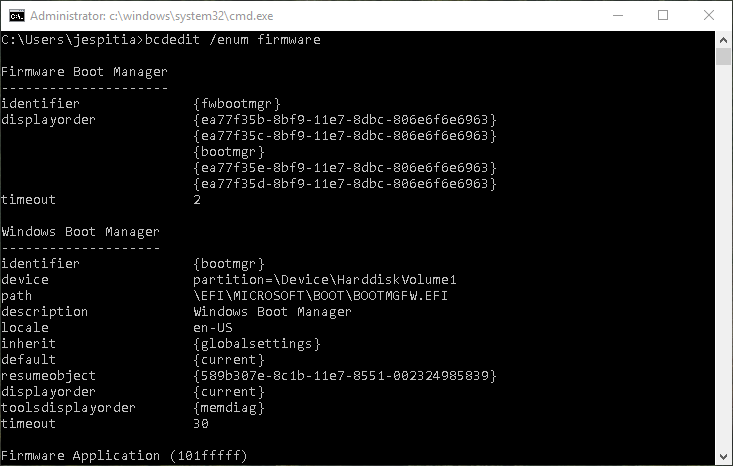
We recently purchased quite a few Dell XPS 13 9365 laptops and while testing our image; I noticed that the list of Windows Boot Manager entries in the BIOS was growing each time I would image the laptop. In order to get around this, I had to create the following script that would automatically scan through the Boot Configuration Data (BCD) store and remove all of the duplicate GUID’s that appear after running the image.

# CONFIGURE MDT LOGGING
$TSenv = New-Object -COMObject Microsoft.SMS.TSEnvironment 
$LogPath = $TSenv.Value("LogPath")  
$LogFile = "$LogPath\WindowsBootManagerRemoval.log"

Start-Transcript $LogFile

# LOCATE GUID
$Identifiers = BCDEDIT /ENUM FIRMWARE | Select-String "identifier" | ForEach-Object { $_ -replace "identifier" }

If($Identifiers -ne $Null) {
    
    $IdentifierList = $Identifiers.Replace(" ","") | Where-Object {$_ -notcontains "{fwbootmgr}" -and $_ -notcontains "{bootmgr}"}
    
    Write-Host "" 
    Write-Host "--------------------------------------------------------------------------------" 
    Write-Host "PREPARING TO REMOVE DUPLICATE WINDOWS BOOT MANAGER ENTRIES"
    Write-Host "--------------------------------------------------------------------------------" 
    Write-Host "" 

    # REMOVE GUIDS
    ForEach($Identifier in $IdentifierList) {
        BCDEDIT /Delete $Identifier
        Write-Host "DELETED $Identifier"
    }
}
Else {
    Write-Host "SKIPPING - COULD NOT LOCATE DUPLICATE WINDOWS BOOT MANAGER ENTRIES"
}

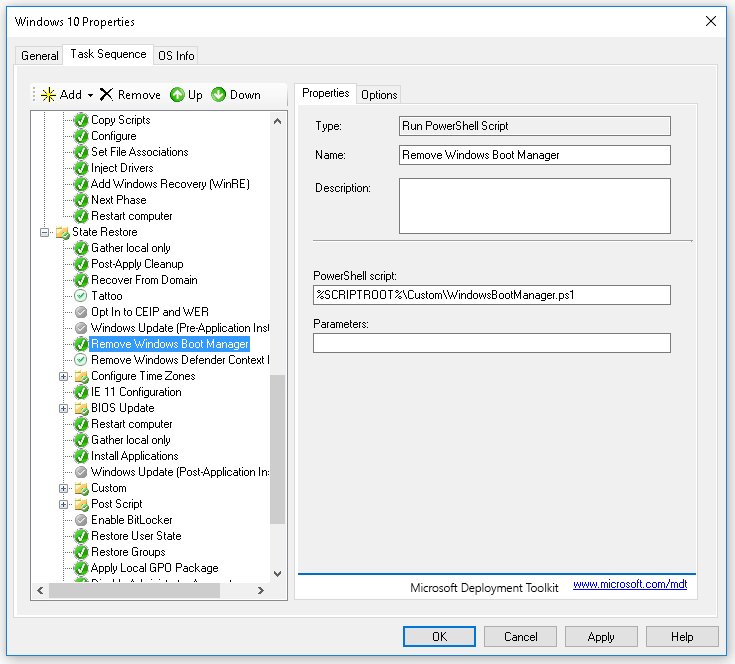
Once you are ready to use the script, go ahead and copy it over to your Deployment Share and add it to your State Restore group in your MDT Task Sequence.
MDT Task Sequence

Since this was not happening to all of our computer models, I made sure to add a Task Sequence condition that forced this step to only run for the Dell XPS 13 9365 laptops.

Feel free to leave any questions below!

Set-Wallpaper Powershell Function

The following Powershell function will change the current user’s desktop wallpaper automatically using the SystemParametersInfo function that can be located in the User32.dll.

Function Set-WallPaper($Image) {
<#

    .SYNOPSIS
    Applies a specified wallpaper to the current user's desktop
   
    .PARAMETER Image
    Provide the exact path to the image
 
    .EXAMPLE
    Set-WallPaper -Image "C:\Wallpaper\Default.jpg"
 
#>
 
Add-Type -TypeDefinition @" 
using System; 
using System.Runtime.InteropServices;
 
public class Params
{ 
    [DllImport("User32.dll",CharSet=CharSet.Unicode)] 
    public static extern int SystemParametersInfo (Int32 uAction, 
                                                   Int32 uParam, 
                                                   String lpvParam, 
                                                   Int32 fuWinIni);
}
"@ 
 
    $SPI_SETDESKWALLPAPER = 0x0014
    $UpdateIniFile = 0x01
    $SendChangeEvent = 0x02
 
    $fWinIni = $UpdateIniFile -bor $SendChangeEvent
 
    $ret = [Params]::SystemParametersInfo($SPI_SETDESKWALLPAPER, 0, $Image, $fWinIni)

}

Example:
Set-WallPaper -Image “C:\Wallpaper\Default.jpg”

For more information about the SystemParametersInfo function, please see this link to MSDN.

Update 08/10/2020:

Per request, I have included a new parameter for the Set-Wallpaper function to configure wallpaper styles.  See the updated function below:

Function Set-WallPaper {

<#

    .SYNOPSIS
    Applies a specified wallpaper to the current user's desktop
   
    .PARAMETER Image
    Provide the exact path to the image

    .PARAMETER Style
    Provide wallpaper style (Example: Fill, Fit, Stretch, Tile, Center, or Span)
 
    .EXAMPLE
    Set-WallPaper -Image "C:\Wallpaper\Default.jpg"
    Set-WallPaper -Image "C:\Wallpaper\Background.jpg" -Style Fit
 
#>

param (
    [parameter(Mandatory=$True)]
    # Provide path to image
    [string]$Image,
    # Provide wallpaper style that you would like applied
    [parameter(Mandatory=$False)]
    [ValidateSet('Fill', 'Fit', 'Stretch', 'Tile', 'Center', 'Span')]
    [string]$Style
)

$WallpaperStyle = Switch ($Style) {
 
    "Fill" {"10"}
    "Fit" {"6"}
    "Stretch" {"2"}
    "Tile" {"0"}
    "Center" {"0"}
    "Span" {"22"}
 
}

If($Style -eq "Tile") {

    New-ItemProperty -Path "HKCU:\Control Panel\Desktop" -Name WallpaperStyle -PropertyType String -Value $WallpaperStyle -Force
    New-ItemProperty -Path "HKCU:\Control Panel\Desktop" -Name TileWallpaper -PropertyType String -Value 1 -Force

}
Else {

    New-ItemProperty -Path "HKCU:\Control Panel\Desktop" -Name WallpaperStyle -PropertyType String -Value $WallpaperStyle -Force
    New-ItemProperty -Path "HKCU:\Control Panel\Desktop" -Name TileWallpaper -PropertyType String -Value 0 -Force

}

Add-Type -TypeDefinition @" 
using System; 
using System.Runtime.InteropServices;
 
public class Params
{ 
    [DllImport("User32.dll",CharSet=CharSet.Unicode)] 
    public static extern int SystemParametersInfo (Int32 uAction, 
                                                   Int32 uParam, 
                                                   String lpvParam, 
                                                   Int32 fuWinIni);
}
"@ 
 
    $SPI_SETDESKWALLPAPER = 0x0014
    $UpdateIniFile = 0x01
    $SendChangeEvent = 0x02
 
    $fWinIni = $UpdateIniFile -bor $SendChangeEvent
 
    $ret = [Params]::SystemParametersInfo($SPI_SETDESKWALLPAPER, 0, $Image, $fWinIni)
}

Set-WallPaper -Image "C:\Wallpaper\Background.jpg" -Style Fit

Reboot computer if up time is greater than 5 days

The following script will reboot a computer if it has an up time greater than 5 days and does not currently have a user logged on.

Function Get-TimeStamp {
     
    Return "[{0:MM/dd/yy} {0:HH:mm:ss}]" -f (Get-Date)   
      
}

$LastBootUpTime = Get-WmiObject win32_operatingsystem
$Uptime = ((Get-Date) - ($LastBootUpTime.ConvertToDateTime($LastBootUpTime.LastBootUpTime))).Days

If($Uptime -gt 5) {
    $Explorer = Get-WmiObject Win32_Process -Filter "Name = 'Explorer.exe'"

    If($Explorer -eq $null) {
        Write-Output "$(Get-TimeStamp) - Uptime = $Uptime Days" >> C:\TEMP\ForcedReboot.log
        Write-Output "$(Get-TimeStamp) - Reboot Initiated" >> C:\TEMP\ForcedReboot.log
        Restart-Computer
    
    }
    Else {
        Write-Output "$(Get-TimeStamp) - Uptime = $Uptime Days" >> C:\TEMP\ForcedReboot.log
        Write-Output "$(Get-TimeStamp) - User is currently logged on.  Reboot has been postponed" >> C:\TEMP\ForcedReboot.log
    }
}