Batch

How to programmatically configure file associations in Windows 10 and Server 2016 without DISM

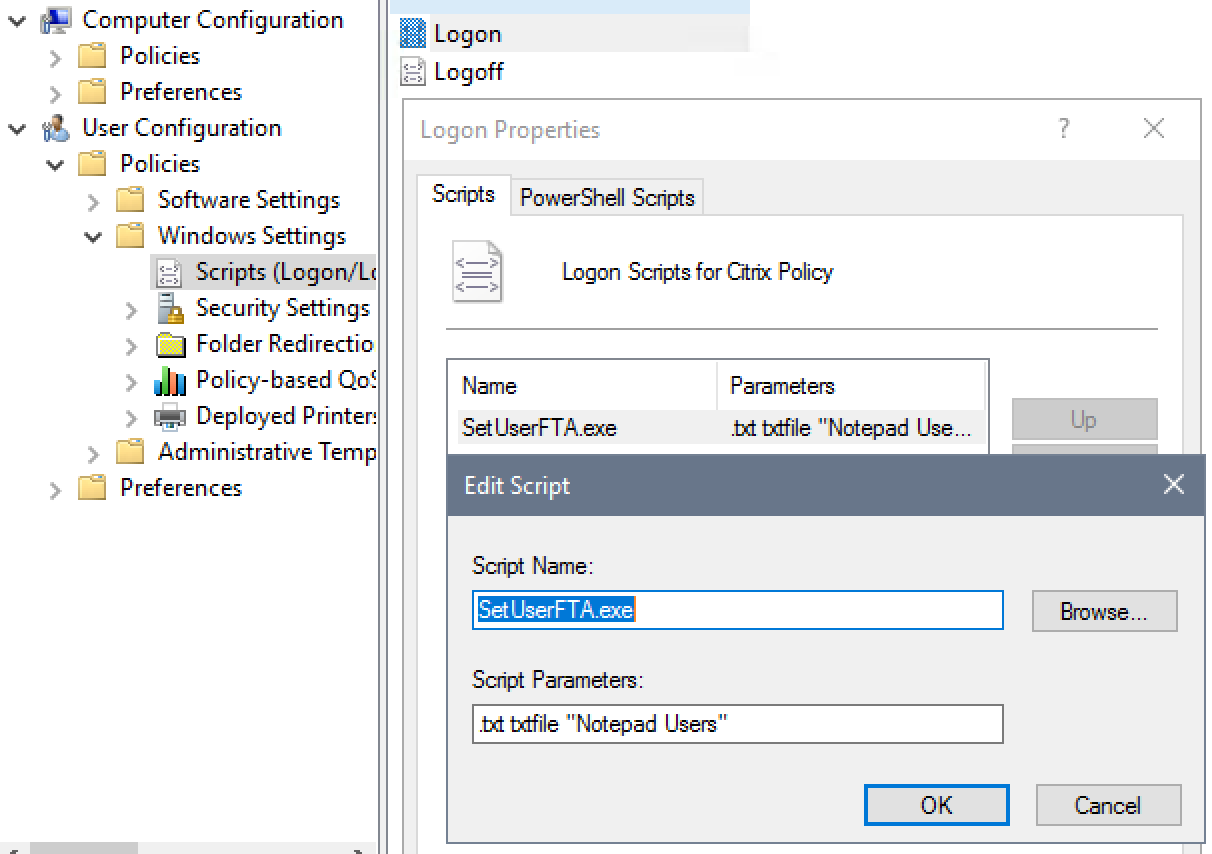
If you are reading this, you are most likely aware that Microsoft has changed how you can configure file associations. Pre-Windows 8, we were able to configure file associations by manipulating the registry but now this method does not work because Microsoft verifies a hash key to determine if the change was made by the user.

Until recently, the only way to configure file associations in Windows 10 was to use DISM to import your file associations XML or use a GPO which would lock down your associations. Using the DISM method only worked for new users so any existing users would have to manually configure their file associations. Luckily someone named Christoph Kolbicz has reverse engineered the algorithm used by Microsoft to create the hash key so now we can programmatically configure file associations!

You are probably wondering how you can do this. Well.. Christoph has been kind enough to share a command line tool that he has created and that you can download from his website http://kolbi.cz/blog/?p=346.

How do you use it?
It’s easy! You can just run the following command to make Adobe Reader DC the default pdf reader for the current logged in user:

SetUserFTA.exe .pdf AcroExch.Document.DC

For more information about SetUserFTA.exe goto http://kolbi.cz/blog/?p=346!

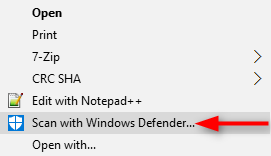
How to remove “Scan with Windows Defender” from the Context Menu

The following short batch script will automatically remove “Scan with Windows Defender” from the context menu for files, folders and drives in Windows 10.

:: Removes Windows Defender from the Context Menu for Files
REG DELETE HKEY_CLASSES_ROOT\*\shellex\ContextMenuHandlers\EPP /F
:: Removes Windows Defender from the Context Menu for Folders
REG DELETE HKEY_CLASSES_ROOT\Directory\shellex\ContextMenuHandlers\EPP /F
:: Removes Windows Defender from the Context Menu for Drives
REG DELETE HKEY_CLASSES_ROOT\Drive\shellex\ContextMenuHandlers\EPP /F

How to exclude specific applications with Lumension Endpoint Security

Open the Windows Registry Editor on the client machine.
Navigate to:
HKEY_LOCAL_MACHINE\SYSTEM\CurrentControlSet\Services\sk\Parameters.

Create a new DWORD (32-bit) value.
The NAME is the file path to the driver \application that you want to exclude, for example if you are excluding the Skype application:
For 64 bit: C:\Program Files (x86)\Skype\Phone\Skype.exe
For 32 bit: C:\Program Files\Skype\Phone\Skype.exe

The Value data is 0 (zero)
Restarting the application or the machine may be required for the change to take effect.
The application specified in the registry entry name will be excluded from protection by Lumension Endpoint Security.

You can of course automate this task by running something like this:

:: Set the file you would like to exclude
SET EXCLUSION="C:\Program Files\Skype\Phone\Skype.exe"

REG ADD "HKEY_LOCAL_MACHINE\SYSTEM\CurrentControlSet\Services\sk\Parameters" /v %EXCLUSION% /t REG_DWORD /d 0 /f

How to programmatically pin icons in Windows 10

UPDATE 01/01/2017:
Microsoft finally released an approved method to pin icons to the taskbar. I would highly suggest using this method since Syspin is a 3rd party tool that is not approved.
You can find out more info here:
https://technet.microsoft.com/en-us/itpro/windows/manage/configure-windows-10-taskbar

In previous versions of Windows, you used to be able to use the verb Pintotaskbar to programmatically pin programs to your taskbar.

Example on how to pin Powershell ISE to the taskbar in Windows 8.1:

    $shell = new-object -com "Shell.Application"  
    $folder = $shell.Namespace((Join-Path $env:SystemRoot System32\WindowsPowerShell\v1.0))
    $item = $folder.Parsename('powershell_ise.exe')
    $item.invokeverb('taskbarpin');

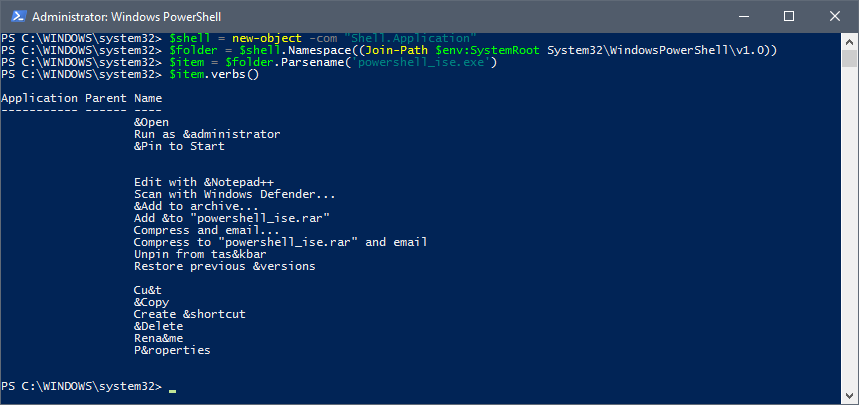
This is no longer the case with Windows 10 and retrieving the verbs with $item.Verbs() from the script above, returns all verbs except for “Pin to taskbar”.  If you right click the file via the GUI, you will see that this verb does indeed exist.

Powershell verb

After a while of researching, I found a great third party tool that can easily pin icons to your taskbar in Windows 10.

The tool is called SysPin and you can download it from the following URL:
http://www.technosys.net/products/utils/pintotaskbar

Below are some instructions on how to use the tool:

Usage : syspin ["file"] c:#### or syspin ["file"] c:"commandstring"
        c:5386  : Pin to Taskbar
        c:5387  : Unpin from Taskbar
        c:51201 : Pin to Start
        c:51394 : Unpin to Start

Samples :
  syspin "%PROGRAMFILES%\Internet Explorer\iexplore.exe" c:5386
  syspin "C:\Windows\notepad.exe" c:"Pin to Taskbar"
  syspin "%WINDIR%\System32\calc.exe" c:"Pin to Start"
  syspin "C:\Windows\System32\calc.exe" c:51201

Unfortunately I haven’t found a way to unpin Edge and the Microsoft App store with this utility but I have been successful using the following tutorial to unpin everything before sysprepping the machine.
http://ccmexec.com/2015/12/removing-the-edge-icon-from-the-taskbar-during-osd/

Good luck and I hope this helps someone!

Windows 10 Upgrade

Depending on your environment, you may or may not need to have prerequisites that need to be done before starting an upgrade. These tasks may include, disabling your antivirus or uninstalling any software that may not be compatible with Windows 10. Once you have automated these tasks you can start the Windows 10 upgrade process by using the following command:

"setup.exe" /auto upgrade /quiet /copylogs %SystemDrive%\Temp\Deployment_Log 

This is a very basic way to silently upgrade your computers to Windows 10.  You can add further customization such as adding a post script that will launch after the upgrade is done.  To do this you can add the /PostOOBE<location>\[setupcomplete.cmd] switch to the command above.

Once you have your scripts ready, you can deploy them with the software that you use to push out your packages (Kaseya, LANDesk, SCCM, etc).

Read more

Uninstall Flash Player

If you are in an environment that has multiple versions of Flash Player, I would recommend using Adobe’s Uninstall Flash Player tool in your Flash Player install script. You can download the uninstall tool here.

Using the following line will uninstall any version of Flash Player that was installed on the computer.

uninstall_flash_player.exe -uninstall

Below is an example script that uninstalls and installs the latest version of Flash Player.

REM Setting Current Directory
cd "%~dp0"

REM Uninstalling Flash
uninstall_flash_player.exe -uninstall

REM Installing Flash
msiexec /i "install_flash_player_21_active_x.msi" /qn /norestart /log "C:\Temp\flashinstall.log" 


IF %ERRORLEVEL% == 0 goto MMS
exit %ERRORLEVEL%

:MMS
REM Copying SilentAutoUpdate Config
IF EXIST %WINDIR%\SysWow64\Macromed\Flash (
    copy /Y mms.cfg %WINDIR%\SysWow64\Macromed\Flash
	copy /Y mms.cfg %WINDIR%\System32\Macromed\Flash
	
) ELSE (
    copy /Y mms.cfg %WINDIR%\System32\Macromed\Flash
)

Windows 10 Sysprep Issue

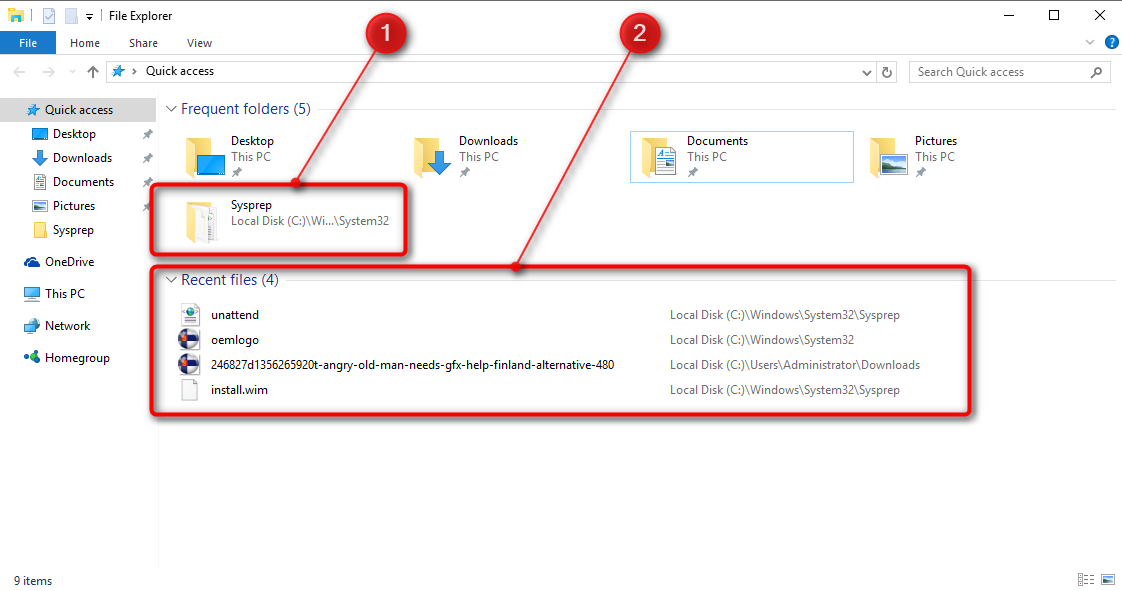
Recently I noticed that when you sysprep Windows 10 and use CopyProfile=TRUE in your unattend.xml, it will copy over the last used folders and recent files of the built-in admin.

Quick Access

In order to remove the Quick Access history, you will need to place a batch file inside the built-in admin’s %appdata%\Microsoft\Windows\Start Menu\Programs\Startup folder in Audit Mode before running Sysprep.

Read more

How to enable Enterprise Mode in Internet Explorer 11

What is Enterprise Mode?

Enterprise Mode, a compatibility mode that runs on Internet Explorer 11 on Windows 8.1 Update and Windows 7 devices, lets websites render using a modified browser configuration that’s designed to emulate either Windows Internet Explorer 7 or Windows Internet Explorer 8, avoiding the common compatibility problems associated with web apps written and tested on older versions of Internet Explorer.

How do I set it up?

You will first need to specify which sites will be rendering in Enterprise Mode. To do this you can use the Enterprise Mode Site List Manager Tool for Windows 7 and Windows 8.1. You can download it here.

Once you have created your XML file and shared it, you will need to run the following command to enable Enterprise Mode with your list:
Make sure to replace “\\SERVER\sitelist.xml” with the location of your XML file.

reg add "HKLM\SOFTWARE\Policies\Microsoft\Internet Explorer\Main\EnterpriseMode" /v "Sitelist" /t reg_sz /d "\\SERVER\sitelist.xml" /f

Now you can view your site list in Enterprise Mode!

Bitlocker Loop Fix

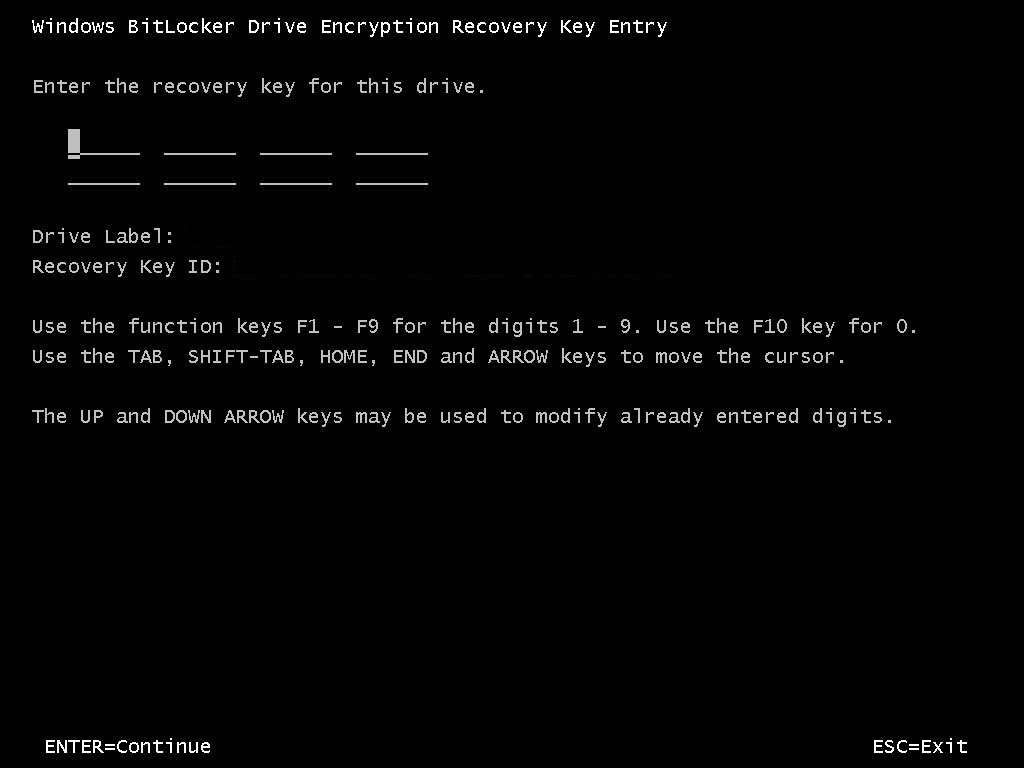
The following script will fix the Bitlocker Recovery Loop that prompts you for your Bitlocker password when you boot up your computer. This script is specifically for Windows 7 computers. Windows 8.1 and above have a much easier way to deal with this. You can find the Windows 8.1 method at the very bottom of this post.
Read more

Automatically Upload Files to your FTP Server

Happy holidays!

I apologize that I haven’t posted anything new in a few days. I have been busy learning Powershell! In the mean time, here is another helpful FTP script.
Read more

Older Posts »
Page 1 of 2